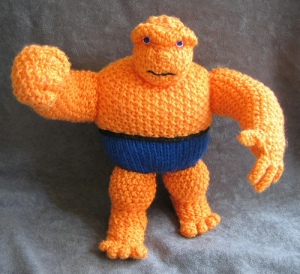
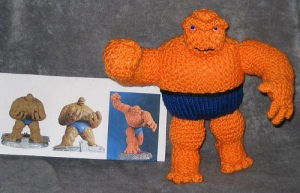
I recently posted a new Character Peep to our flickr pages modeled after the Marvel Comics' character the Thing (link), and suddenly, it went a little mad in our e-world! :o) Apparently, there is a LOT of interest in the Thing (member of the Fantastic Four in Marvel Comics, and recently immortalized even further in a big screen movie). Folks were viewing and blogging about our humble little version, and interest in a pattern became apparent.
Making the Thing
Unfortunately, as I've mentioned, I rarely knit from a pattern, and usually knit freehand, inventing (sculpting the shape) as I go, so there is really no exact documentation of how I made the Thing. I can reconstruct a close approximation of how I made him, but the exact execution will be up to anyone who wants to duplicate my efforts.
Update: I'm hard at work, writing an actual pattern. I hope to have it finished within the next week, and I will post a link here as soon as it is ready.
I did take a few "in progress" photos, during his construction, and hope that they will help you to visualize the process. I will include them on the page with the pattern when it is completed.
BRIEF OVERVIEW OF THE THING'S CONSTRUCTION:
There is really nothing very unusual about the construction of the Thing. He's actually engineered in the same way as any basic, two-legged, standing, toy, and can be crocheted, instead of knit, if you prefer. My version is knit in seed stitch (k1p1 then knit the purls and purl the knits) except for the shorts which are stockinette.
If you've made other toys or amigurumi, he is made using the same process.
- Starting from one foot, knit the foot and leg in the round in the same way that you'd knit a simple sock or bootie.
- Put the stitches from the first leg onto a holder and make the second leg the same as the first and add the toes to both feet.
- Attach the color for the shorts and knit across both legs (front and back), picking up the stitches for the first leg from the holder.
- Knit the torso in the round up to the neck, (changing back to the body color at the waist).
- Knit the head and arms (including the fingers) and sew them onto the torso.
- Knit the brow ridge and sew it on.
- Knit the waistband and sew it on
- Pop in the eyes and embroider the mouth
VOILA! The Thing!
Since he wasn't going to a small child, I did insert pipe cleaners into the legs, arms and torso, to give a little posability and stability (because he's so top heavy).
For much more detailed instructions, please see the Pattern for the Thing linked to on the


Hi there.
ReplyDeleteLove your peeps! :-)
ReplyDeleteHi Fluxx! So nice of you to visit, and thanks for the lovely comment! :o) I love ALL of YOUR wonderful creations!
ReplyDelete