flickr.com/knittycat


Tips & Techniques for Knitting theknittycat's Peeps and Other Toys

Showing posts with label knitting. Show all posts

Tuesday, October 5, 2010

Pattern Notes for Stitch - Lilo's Friend

^..^

Oh, YEAH?!  Just try and MAKE me!
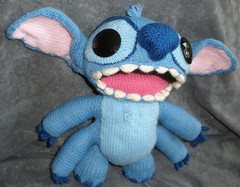
Stitch (of Lilo and Stitch) late for Tony's Birthday

As requested, I'm making my pattern notes for Stitch (of Lilo and Stitch) available.
                                   (for more pics and Stitch's story, please see previous post)

This isn't a complete pattern, but most of it is there and I've spent the past few days cleaning it up and filling in some of the blanks. But it is still an incomplete and untested pattern. But it's free so I guess you're not risking much.   ;o) 

I won't be making another Stitch, so I won't be bringing this to any further level of completion, but if you find any glaring errors or come up with improvements that you'd like to share, please email or comment and I'll pass the info on.  :o)

You'll find the link to the PDF for Stitch's Pattern Notes on my patterns page.  You can click on the “Patterns and Tutorials” link at the top of this page or just click here.

Stitch is knit in the round (I used two circular needles) and his torso, 4 arms, and head are knit in one piece. Legs, ears, eyes, nose and color patches are knitted separately.  There are no seams. I would not suggest this for a beginning knitter. But determination is a wonderful thing.  :o)  I have included links for tutorials for some of the techniques I use.

I know that some of you totally enjoy these larger projects (Yesterday, I saw an etsy listing for a crocheted Mickey Mouse, and a Snoopy too, the size of a 10-year-old child!! WOW!), but since I really dislike making these larger ones, I have promised myself to make only the smaller peeps from now on. The larger ones take so much time, and I don't like to devote so much of my time to one project. There are sooooo many more peeps that I want to make, and that I have on my list as requests, So this was my last of this size.  It was a labor of love for our nephew.

Back to the wee peeps! Yay!

Oh, my fingers are itching to knit another Hello Kitty ...
I'm just dying to make one after seeing a totally adorable crocheted one that K and J Dolls has available! But I have too many other peeps that I need to get to, so I don't know when I can squeeze her in. Drat!

Here's my one and only Hello Kitty, made in my early days of toy knitting (made for an adult - thus the bead bling).
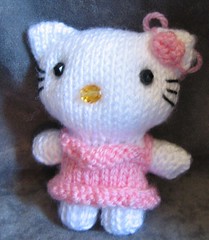
Hello Kitty for Nicole front 3 qtr

The one by K and J is just wonderful! I love their designs! If you crochet your creations (I don't, because of hand issues), and if you work from patterns (I don't do that either), you should definitely check them out!

A last note... I'm just finishing up a new pattern for Elmo (it will be for Cookie also), using a more standard toy knitting approach than my original doubleknit pattern. Though the original was easy to do, and it was fun to use the doubleknitting, I really prefer the results of doing it this way. It's neater all around. The stitches are tighter and you have better control over the increases and decreases. (doubleknitting by nature is looser because of the slipping of stitches) I'm just finishing making one more Elmo using the pattern (another request, but a good opportunity to test the pattern again) and then I'll post it.

Okay, I know you want to know where to find that giant crocheted Mickey Mouse pattern! Heh heh.
He's here: http://www.etsy.com/shop/Chonticha
along with a bunch of other wonderful designs! Including a super adorable crocheted Lilo AND Stitch pattern! This designer is so talented!

And here's the link for K and J Dolls' Hello Kitty,
http://kandjdolls.blogspot.com/2010/09/kimono-kitty-by-theresa.html
and to the rest of their patterns. I just love everything they do!
http://kandjdolls.blogspot.com
http://kandjdolls.etsy.com/

Oh, pfui! In getting the links, I just read that they’ve had to take down their HK patterns due to a complaint by Sanrio. :o/ Well, you can still use the photos as inspiration, anyway. That’s what I do.   ;o)  It’s certainly reasonable for Sanrio to stop people from profiting from their property, but wouldn’t it be nicer to ask the transgressors for a percentage of their profit instead of robbing the world of such cuteness? *sigh* She did such a great job of designing those HK’s!  :o/

Hope you're all having a great week! It's raining here, and in Sunny Southern California, it's a welcome relief! I love the rain.  :o)  Especially after that scorching week of Indian Summer we just had.

Wishing you all the Best!

Thursday, September 30, 2010

Animated Amigurumi Peeps - Stitch (but no Lilo)

                                                                                                                                         ^..^
FINALLY!!! A very belated gift for Tony's April birthday (yes, APRIL! I'm so behind!)
  Update: Pattern now available!  See the following post (link to the pdf is on the patterns page):
    http://theknittycat.blogspot.com/2010/10/pattern-notes-for-stitch-lilos-friend.html

- Stitch -
the little blue alien from Lilo and Stitch


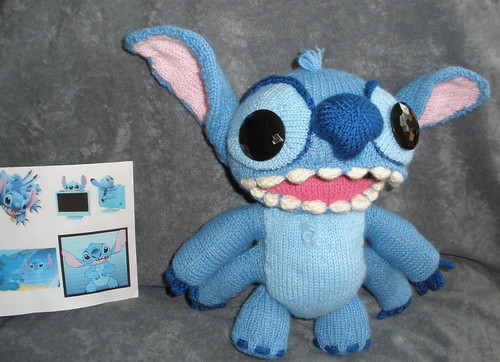
Oh did this guy give me trouble!!! He's much larger than my usual, and with that huge head, it was like wrestling with a fat blue baby!! :o) Four arms, 16 claws, 8 toenails, 16 big TEETH!! Whew! He took me AGES! I started him in February, and just finished him last week!!! (okay, yes, I did make a lot of other peeps in between, but he was so exhausting for me to work on, I had to keep putting him aside!) But he's finally done and Tony really really loves him! So it was all worth it! Well ... now that it's done, it was worth it!! ;o)

I'll never do it again! I've sworn off making large peeps and I'm sticking to small and tiny ones! :o) Okay, my friends say they've heard that before... but this time I MEAN it! Really! Honest! heh heh
I knit Stitch from the bottom up. His body, arms and head are knitted in one piece with the medium blue yarn, and his legs, ears and nose (and color patches) are grafted on.

here he is with some of my photo references


Aren't those marvelous buttons for his eyes?!
I tried sooo many different things and was not happy at all, then my dear Hubbard came home one day with these beauties! :o)

and here with more photo references


and from the back showing his tattoos(?) Well, his dark blue markings.
I'm not sure what exactly they are.


Did you know that Stitch had a little nub of a tail? I didn't till I started researching photos! :o) I forgot to take pics of the bottoms of his feet, but they have blue circular patches (you can see them a little bit in this pic above) - knitted in, not sewn on, since I could do them in the round while I made the circular bottoms of the feet.

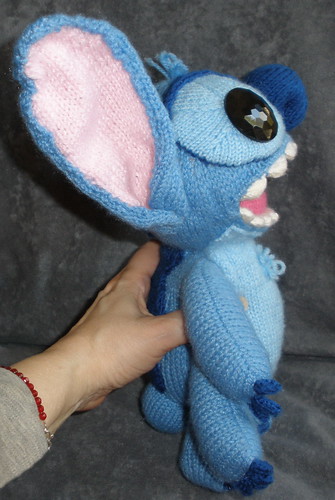
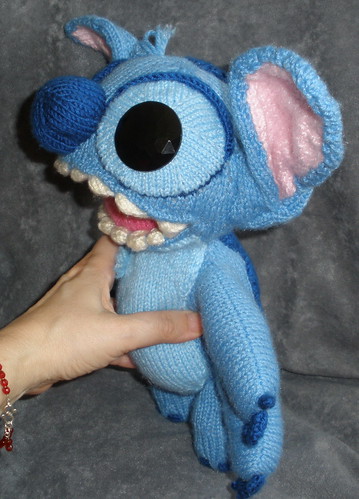
And so you can see his relative size - here he is in my hand and from the side
(see the notch in the top area of his ear?)


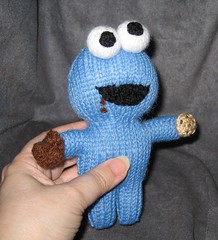
    Just for reference... this is the size of
    peep that I like to make!  :o)

Cookie Monster in My Hand
Cookie Monster Peep


Restraining his enthusiasm!

(and another notch, in the bottom area of this ear)

You can kind of see in this picture that he's nice and squishy.
Nice and cuddly, except for his giant button eyes! :o)

With two layers of knitting and curled around at the bottom, even as large as they are, the ears came out surprisingly poseable. :o)


RAAAAARRRRRGGGHH!

heh heh

Something about his big open mouth seems to fascinate people. :o)
Everyone wants to stick their hands in it! heh heh


including ME!

I told Tony that Stitch is like that wall sculpture in Rome (Boca Della Verita - the Mouth of Truth)...
If you tell a lie while you have your hand stuck in his mouth, he'll BITE it! ;o)

Almost a Pattern
I don’t have an actual pattern for Stitch (and won’t be writing one), but I did discover, just last night, that I made LOTS of notes as I was knitting him, which I had totally forgotten doing. I wrote out nearly everything I did, but not quite - there are missing bits. I did not complete the head decreasing instructions, and did not note how I made the patches for his tummy and back. (Frankly, I didn’t do such a great job on those patches anyway - you could do better, I'm sure.)

I may make my notes available in a pdf later, if folks want them.   
UPDATE:  Pattern now available. See this post for pattern information

Color Patches
As you can see, there are a lot of color patches on Stitch. I'm dreadful at knitting colorwork! I just hate doing it, and it never looks neat to me, so I usually avoid it very carefully! heh heh But since Stitch had all these different shades of blue, I had to work out something. As usually happens, I try various ways of knitting the color in, and wind up chucking that idea, and making separate patches of the colors and grafting them on. :o/

Weeks after knitting Stitch's color patches, I recently was working on Snorlax for Matt (see next post for Snorlax and Jigglypuff) and came up against my nemesis again... colorwork! I made a determined effort to find a good way to do intarsia in the round, since I always work in the round (intarsia worked flat is not such an issue). So I did a bunch of research, and tried a few things out, and was - again - very dissatisfied!! Well, in my opinion, it seems there isn't a "good" way, just work arounds. Gave that idea up and relegated myself to another set of less than satisfactory patches to stitch on. But then I came up with a better way to make the patches! I was very pleased with the outcome on Snorlax and wish I'd discovered the idea while I was making Stitch. But better late than never, I guess. And I'm less disgusted at the thought of making another peep with color patches again! But I'll still avoid it when I can!! ;o)


Update: you can see how I made his teeth and claws in the pattern, which is now available.  
See the next post (the link to the pdf is on the patterns page):
http://theknittycat.blogspot.com/2010/10/pattern-notes-for-stitch-lilos-friend.html

Teeth
In case you're wondering how I made Stitch's teeth (all 16 of them!!) ... since I reeeeaaaallllyyy did NOT want to make sixteen little pieces and sew each of them on (YUCK!) I tried a few different ideas and settled on knitting them from side to side (actually in the round so they'd be 3 dimensional) in a long strip, using short rows for the shaping (details in my notes). That worked fine! :o) They're two strips of teeth, which I later sewed into his mouth. After grafting the teeth in (using kitchener stitch) I still felt there should be some overlap of his blue lip onto his teeth so I went around his mouth, pulling the blue fabric over the teeth and stitching it down. Yes, it was tricky with that big blue head attached to the big blue body hanging off of what I was sewing!! heh heh My hands still hurt!!!

Claws
For his claws and toenails I knitted short I-cords and pulled them in between the stitches of his paws and feet. For the toenails I used one I-cord for each foot. For each foot, I pulled the completed cord through every couple of stitches, over and under, horizontally. For his claws I made one I-cord for every two claws (two for each paw, making four claws per paw). I pulled the finished cord into one stitch and out another, a couple of stitches over, and stitched them in place to ensure that they wouldn't pull out. That worked extremely well, and I used the same method for Snorlax's teeny claws (see next post).

Vox.com
One last note:
Today is Vox.com's last day ... so goodbye to vox ...
and HELLO! to blogspot.com! :o) So far I'm quite happy with how well things work here! Yay!


Friday, September 3, 2010

knittycat.vox.com has MOVED! Vox.com is closing


Vox.com is closing!


Wow!  What a shock!  Bloggers at vox.com just found out that the site is closing in less than a month (September 30th, 2010,  and we have to move everything or lose it all!

I've just imported www.knittycat.vox.com to
www.theknittycat.blogspot.com,
www.theknittycat.wordpress.com, and
www.theknittycat.typepad.com
(not to livejournal because lj does not allow importing from another blog for some sad reason).

I'll try each of them out and see what works best.  Maybe moving to another site will turn out to be a good thing.  We’ll see…

I'm just really happy that I was able to import my posts to other sites!!  Whew!  All those peeps ... nearly lost in oblivion... what a scary thought!

But now they have lots of room to play!  Alll over the internet!  ;o)

Obviously, this is a work in progress... getting the formatting fixed may take a while.  But at least the posts will survive... I HOPE!  :o)

Sadly, I'll be losing my vox.com site counter.  :o(

Today's count was:
vox site counter September 3, 2010

I will cross post to all three sites for a while, to test them out, and let you know my findings.

A sincere thanks to all of you who have  followed my silliness on vox, and who have been so patient, waiting for me to come up with a pattern occasionally.  I hope to see you in my new home.  And to hear from more of you, since the commenting at each of these new places is open to anyone, not just members!

Saturday, February 27, 2010

Eggy Peeps, Pretty Easter Egg Yarn, And Free Pattern!! :o)

I recently got some beautiful self-patterning yarn, Bernat Baby Jacquard, to make some socks and while looking at the socks I had made from one of the skeins, I thought that it would make wonderful Easter Eggs!  :o)  Soooo....

Chiwaluv and I were "chatting" about the Easter Eggs and Eggy Peeps, that I'm making for Easter gifts, and it occured to me that you folks might like to know about the yarn for your Easter knitting and crocheting.

I'm including notes for how I knit my eggs, plus a few egg pattern links, both in crochet and knit ....


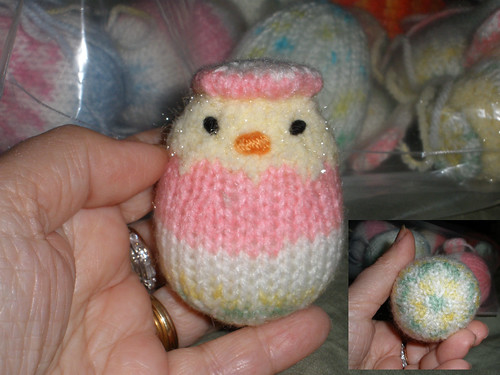
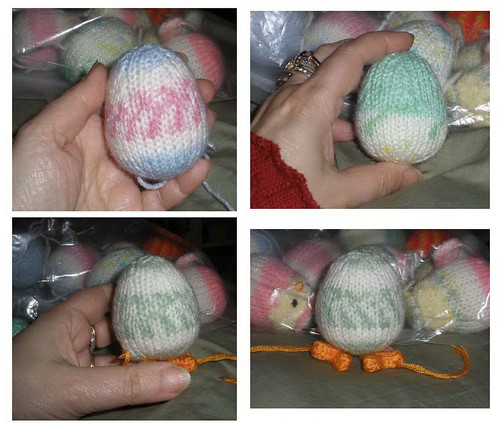
Easter Eggs and Eggy Peeps in progress

inset is the pattern on the bottom of the egg


The one with feet (in progress - ends still sticking out and feet just pinned on) is from the
same skein as the hatching egg!


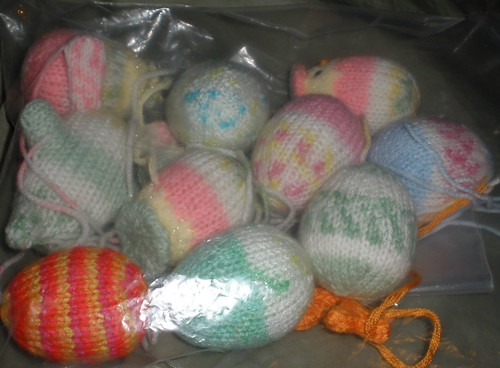
a bunch of eggs and one Eggy Bunny in progress
(the orange and yellow striped egg is made with a variegated yarn
-Red Heart Kids, I think- for a special nephew who adores those colors)

This Bernat Baby Jacquard yarn is just terrific!  From one skein, you will get lots of eggs, each different from the others.  The eggs I've made (so far) are from three different colorways, but just from one skein, I've gotten several egg designs with real variety!  :o)

I'm also making little nests and bags for the peeps.  Nothing so elaborate as last year, since I'm still quite sick, but I LOVE making these sweet eggies!

Knitting the self patterning yarn in the round creates these wonderful patterns that they were designed for, but it would be very interesting to crochet with it (or knit the eggs flat) to see what kind of patterning that makes, too!  :o)

My version of eggs is super simple.  They could be done on dpns or converted to flat but I knit them  in the round on two circular needles.  If you haven't tried two circs yet, this would be a good opportunity to try them on such small projects -  it's soooo much easier using the two circs than working with dpns, and it's much easier on your hands as well.  Of course that's just my opinion that they're easier to work with - 'cause I'm not coordinated enough to use dpns.  ;o)

Pattern Notes:
Using Bernat Baby Jacquard or other self patterning or variegated yarn and (2) U.S. sz 3 circular needles...

I make my eggs like I'm making a ball for the first half, then just add a couple of extra plain rounds to the middle (in addition to the couple of plain rounds you normally do) to elongate it. Then for the decreasing
rounds, I do two plain rounds between the decrease rounds instead of one which makes the tapered top.

Disclaimer:  These pattern notes have not been tested, so if you're unsure, use one of the patterns written by the experts that I've linked to at the bottom of this post.

1. Using two circular needles (I'm using U.S. sz 3's), cast on 6 st 
with Judy Becker's Magic Cast On
(or cable c/o 3 on 1 ndl, k acr, p/u  3 on 2nd ndl from bottom of cast on)
2. Inc in ea st (inc1, k1) arnd (12)
3. K arnd
4. (Inc1, k2) arnd (18)
5. K arnd
6. (Inc1, k3) arnd (24)
7. K arnd
Cont. in this manner, increasing 6 st ev rnd till you reach the 
diameter you want (I went to 36 stitches)
8. (Inc1, k4) arnd (30)
9. K arnd
10. (Inc1, k5) arnd (36)
11. K arnd 8 or 9 times
Start decreasing in the same way that you increased, but with an extra 
knit rnd between (decrease 6 st ev third rnd)...
Oh and start stuffing before the hole gets small!  ;o)
12. (K2tog, k4) arnd (30 st)
13. K arnd 2x
14. (K2tog, k3) arnd (24 st)
15. K arnd 2x
16. (K2tog, k2) arnd (18 st)
17. K arnd 2x
18. (K2tog, k1) arnd (12 st)
19. K arnd (only 1x to make it a little more rounded at the top)
20. K2tog arnd (6 st)
 Kitchener st closed (or close as you would normally close a ball)

Hatching Easter Eggy Peeps

Make the same as the eggs, but switch to yellow yarn (I used a fuzzy  yarn) after the first decrease round.
 (I carry the egg yarn up through the egg to make the cap in one piece with the egg, instead of breaking and reattaching it.)
Add a cap by knitting a disk and sewing it on, or in one piece as follows:

When you have decreased down to 6 st again, switch to egg yarn
rpt  steps 2-7 of the beginning of the egg pattern
Then decrease back down again as you would decrease for a ball.
1. (K2tog, k2) arnd (18)
2. K arnd
3. (K2tog, k1) arnd (12)
4. K arnd
5. (k2tog arnd (6)
6. Kitchener st closed (or use your favorite method of closing)

Flatten the shape you have just made and stitch it down with the tail of yarn.
Add a few bits of yellow below the start of the yellow rounds with duplicate stitch to make it look jagged, or you can slip some of the stitches on the first round of yellow.


Update 03/12/14

Pattern notes for Leggs for "Eggs with Leggs" now available here:
 
If you want to crochet eggs, I would think it's the same premise except eliminate half of the knit plain rounds.  So you'd increase every round till reaching your desired diameter (like making a ball), crochet around several times without increasing,  and then decrease every other round to taper.

And here are free patterns from the experts... 
Littlecottonrabbits' pattern includes really beautiful fairisle ones!
(I don't like to do colorwork, so I LOVE self-patterning yarn!!)

Jean Greenhowe's free pattern (knit flat)
http://www.jeangreenhowe.com/Images/Novelty_Eggs.pdf

Littlecottonrabbit's free pattern knit flat with fairisle instructions for pretty colorwork!
http://littlecottonrabbits.typepad.co.uk/free_knitting_patterns/

Curlypurly's, purlbee's and emmyknits, in-the-round on dpns free patterns
http://www.curlypurly.com/eggs.html
http://www.purlbee.com/knitted-easter-eggs/
http://emmyknits.wordpress.com/2009/04/11/easy-knitted-easter-eggs/

And here's a couple of crochet patterns that I found, too!:
http://knittingcrochet.suite101.com/article.cfm/easter_egg_crochet_pattern
http://www.thecraftytipster.com/amigurumi-egg.html

I bought the yarn here:
http://www.joann.com/joann/catalog/productdetail.jsp?pageName=search&flag=true&PRODID=xprd561154


Spring is coming! Yay!


Read and post comments | Send to a friend

Monday, October 5, 2009

Sackboy / Green Lantern for Matt's Birthday!

Sackboy, the character from the PS3 videogame, LittleBigPlanet, has become so popular that I thought he'd make a nice gift for our nephew, Matt, who is a collector.

I finished my version of Sackboy for Matt recently (knit without a pattern, as usual), and presented him for his birthday.

Voila!  Sackboy Peep:

Sackboy Front View Sackboy Front View

I just barely finished in time!!   Boy was it a pain to put that working zipper in!  And I hate sewing things!  ;o)   I'm even MORE impressed with all of the amazing Sackboy's that folks have been creating after making one myself!

I used my loopy legs (flap) technique to make the mouth so I wouldn't have to sew it on.  And it worked great!  :o)

My Hub and I both liked him better before I added the decorative grey stitching, but for Matt, I wanted to be as accurate as I could, since he's a collector.  I did leave off the two vertical lines at the back of his head.  Just didn't like 'em.  But I told Matt that I'd put them in if he'd like them - and guess what... he told me last night that he WOULD!  Yep... a collector!  heh heh  So Sackboy Peep will be coming back for some cosmetic surgery!  ;o)

My Hub  is totally crazy about him, and REALLY wants me to make another one for him!  Well.... actually, he said to make another one for Matt and he'll just keep this one!!  ha ha ha!  He wouldn't do that, of course, but he just fell in love with him.

Sackboy Peep with photo reference:


Sackboy Peep for Matt's Birthday Sackboy Peep for Matt's Birthday

He has a working zipper, and I made a felt inner body so he could be opened. (ugh!  That was a pain! And my Hub wants me to do this AGAIN!!!)  When you open his zipper, you can see his little golden heart (a stone bead that's gold with a brownish edging).  :o)


Sackboy Peep with Golden Heart:

Sackboy Peep with heart of gold for Matt's Birthday Sackboy Peep with heart of gold for Matt's Birthday


I've seen so many Sackboys that other folks have made (including the Alan Dart pattern) wearing a pom pom hat and scarf, that I figured that they must be something that Sackboy wears, so I made him a set.  We recently got the game (incredibly adorable and FUN!), but I haven't seen the hat and scarf yet.  So I dunno.  But here's


Sackboy Peep with hat and scarf:


Sackboy Peep with hat & scarf for Matt's Birthday Sackboy Peep with hat & scarf for Matt's Birthday

And since Sackboy loves to play dress-up and take on different characters, and because Matt has been very into The Green Lantern lately (new movie coming out, too!), and because GL is one of my all time favorite comic book characters... I made...

Taaa DAAAA!!!


Green Lantern Sackboy Peep!

Sackboy GL Peep recharging his ring Sackboy GL Peep recharging his ring

I like him best without the mask.  :o)

I finished his little vest (with very poorly made emblem) just in the nick of time, and my Hub and I are so pleased with it.   It's made like a little bib!  heh heh   I'm really happy I managed to squeeze in making it before Matt's birthday.

And here he is saying his official oath while charging his ring (hee hee) ....

Green Lantern Sackboy Peep for Matt's Birthday Green Lantern Sackboy Peep for Matt's Birthday

The beautiful green yarn is Bamboo Soft Spell and Bamboo Charmed from www.yarncloud.com! It's a chainette yarn, and sooo nice to work with!  Nice sheen, gorgeous colors, and has all those nice bamboo properties!  :o)

Here's a better look at his power ring:

Sackboy Peep from Side Sackboy Peep from Side


Sackboy GL Peep ring close Sackboy GL Peep ring close

I would have liked to have done a better job on the ring, but just didn't have enough TIME left!!


Green Lantern Battery for Sackboy Peep for Matt's Birthday 3/4 view Green Lantern Battery for Sackboy Peep for Matt's Birthday 3/4 view


Green Lantern Battery for Sackboy Peep for Matt's Birthday front Green Lantern Battery for Sackboy Peep for Matt's Birthday front

Close-ups of the Green Lantern's Power Battery...


which I'm absolutely nuts about!  If we were meanies, my Hub would keep the peep and I'd keep the Lantern Battery!!  ;o)  I put 4 golden dollar coins in the bottom to weight it (they were just the right size - and makes the battery even more valuable and powerful -  heh heh) and a chenille stem in the handle to give it strength and body.


It was fun taking a trip down comic book memory lane!  :o)


.

Read and post comments | Send to a friend

Tuesday, March 17, 2009

Happy St. Patty's Day - Something Green - the Hulk!

Happy St. Patty's Day Everyone!  

Yep, I missed Valentine's Day... I'll try to post a few Valentine's things in an Easter post...
(crossing fingers that I feel up to that).

Here's a Big something Green for St. Patrick's Day

Marvel Comic's The Incredible Hulk for Matt's Birthday with Lambie Pie


Marvel Comics the Incredible Hulk! for Matt's Birthday, with his best bud, Lambie Pie... ;o)

Our nephew, Matt, had been wanting a Hulk, since I started making these peeps, but I could never bring myself to make one... But, when I ordered a variety of green yarns to get the right shade for something I was making, one of them arrived and I said... Omigosh... it's Hulk green! And I already had some bluish purple that would work for pants... so there I was, making the Hulk! :o) I intended to make him a LOT smaller, but he just happened! ... these things have a life of their own.


I actually finished him just a day before Matt's birthday (Whew!), last September! But I could never decide which photos to post, so he's been languishing, waiting to be seen. He's not really my cup of tea, with his angry face. I like CUTSEY things! With sweet smiles! But he was a challenge, and I learned a lot of things while making him that are useful in other projects, as well. Lambie Pie says that he's much sweeter and nicer than he looks.


One of my fellow amigurumi artists said "he's not angry, just having a bad face day, I guess". heh heh
And that's how I'm looking at him from now on! ;o)

He's not cross-eyed, by the way, just a trick of the camera, and the reflectiveness of the eyes, I guess.

He's the largest peep I've made at 15" tall and nearly as wide! And he's knitted in one piece from toes to top of head, and then each of his arms knitted in one piece, from fingers to shoulders, and sewn onto the torso. I did make notes while working on him, so hopefully I will be able to share the techniques that I discovered, and developed, in the future.


You probably can't tell from my photos, but the waist of his pants is ragged and ripped looking, with a scrap of white shirt left stuck in it, and the hems on the pant legs are ripped. I didn't do a good job of capturing that in the pics, unfortunately. Didn't have him for long after finishing him, and had to take the pics in a hurry.


I'm kind of fanatical about not wanting to attach pieces, as you might have noticed, and I was pretty tickled with the method I finagled for making his torn up waist, and hems on his pants, with my trusty knitting needles, all in one piece with his body, and never having to sew any bits on! YAY! Too bad it shows up so poorly on the pics.

Also, I found a new and very simple method of making hair while working on Miss Piggy, for my DH (she's still not finished, unfortunately, so obviously not posted), and I used it to make the Hulk's hair. It's a really versatile technique, and very easy to do, too. You can make short or long hair using this method. I hope to write up a tutorial for it at some point. Or I will at least post a simple description of the process. As long as you use an eyelash or fuzzy yarn of some sort, appropriate to your project, it is super easy to do! And I do like easy! :o)


Happy St. Patty's Day!


Lots more Peeps photos to be found at http://www.flickr.com/knittycat
and Pudge photos at http://www.flickr.com/anthor

Sunday, December 23, 2007

MERRY CHRISTMAS! Our gifts to you - PATTERNS!!


MERRY CHRISTMAS!!
 

We wish you all the very best Holiday Season! 
A very Merry Christmas and a Happy and Healthy New Year to All!

Our gifts to you:
Muppet Patterns!


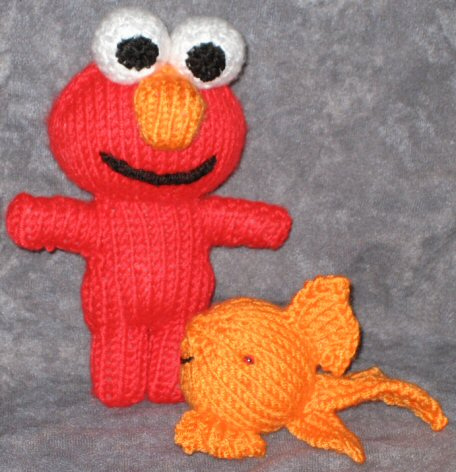
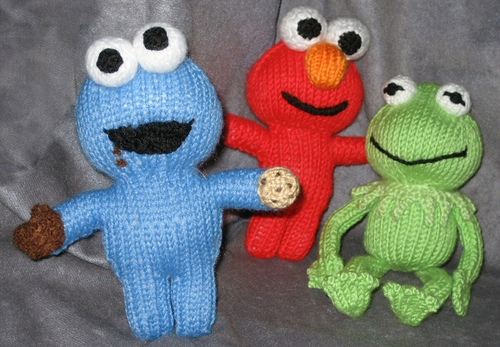
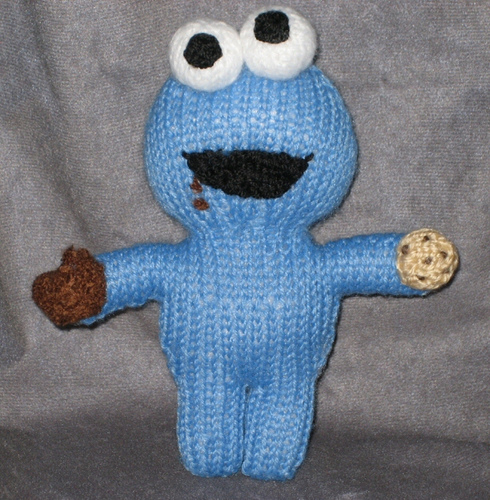
Christmas Cookie Monster for KristinaElmo Peep:


Cookie Monster Peep:


the Thing Pattern? 


Well, the pattern's written and the photos are in it, but it's not fully proof read. 

But here it is anyway!  :o)


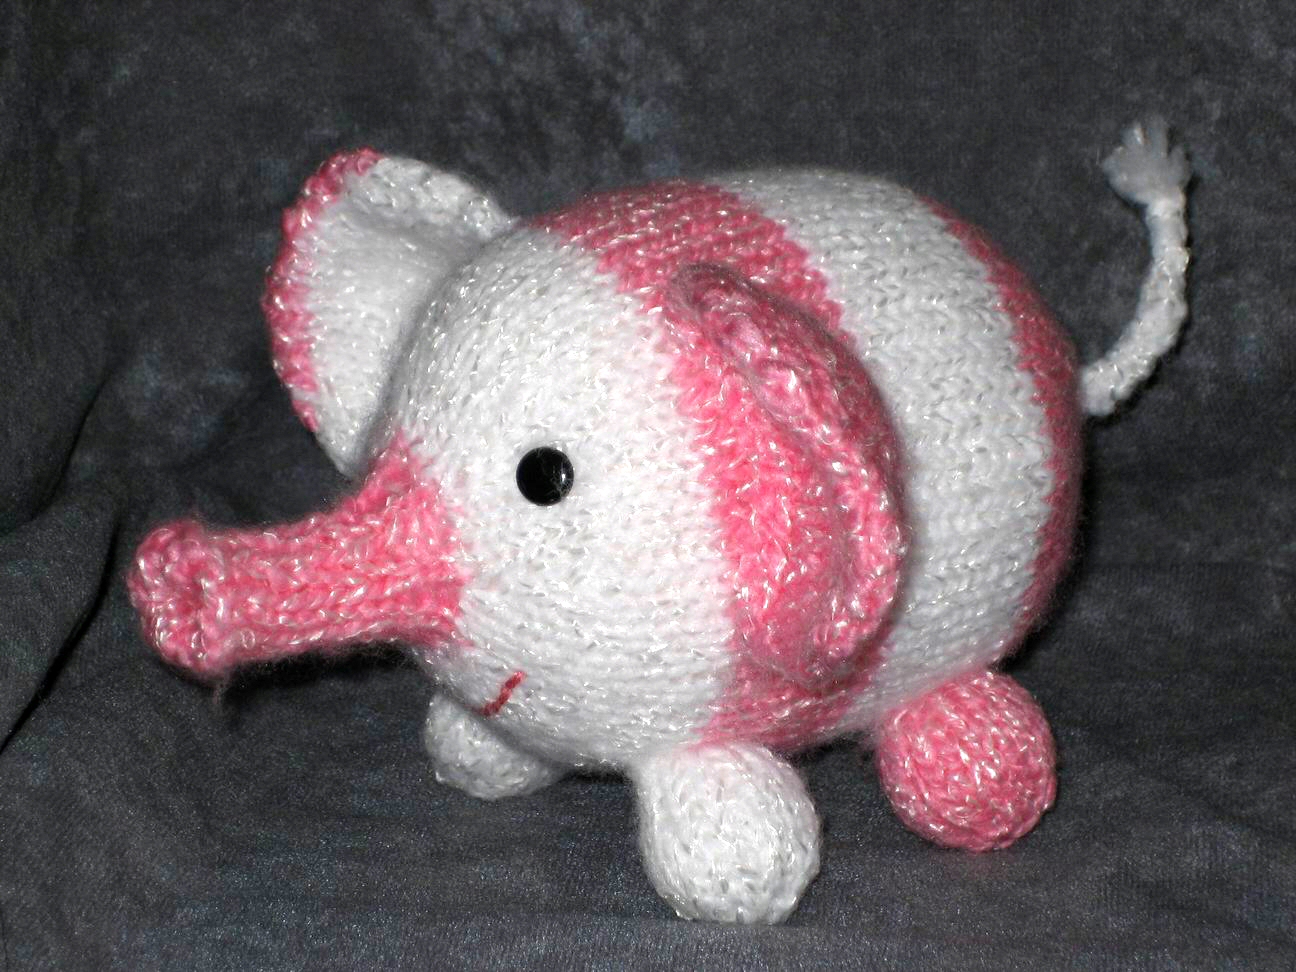
Nellie the Elephant is ready too!


Much Joy and Many Blessings to Everyone!

Please check out www.flickr.com/knittycat for larger photos and all of the peeps.


Saturday, November 24, 2007

Nearly a pattern for the Thing, and other Peep patterns!


Please check out www.flickr.com/knittycat for larger photos and all of the peeps.

A pattern for the Thing?!  Is it possible that she's FINALLY finished it??


Well, It is possible... 


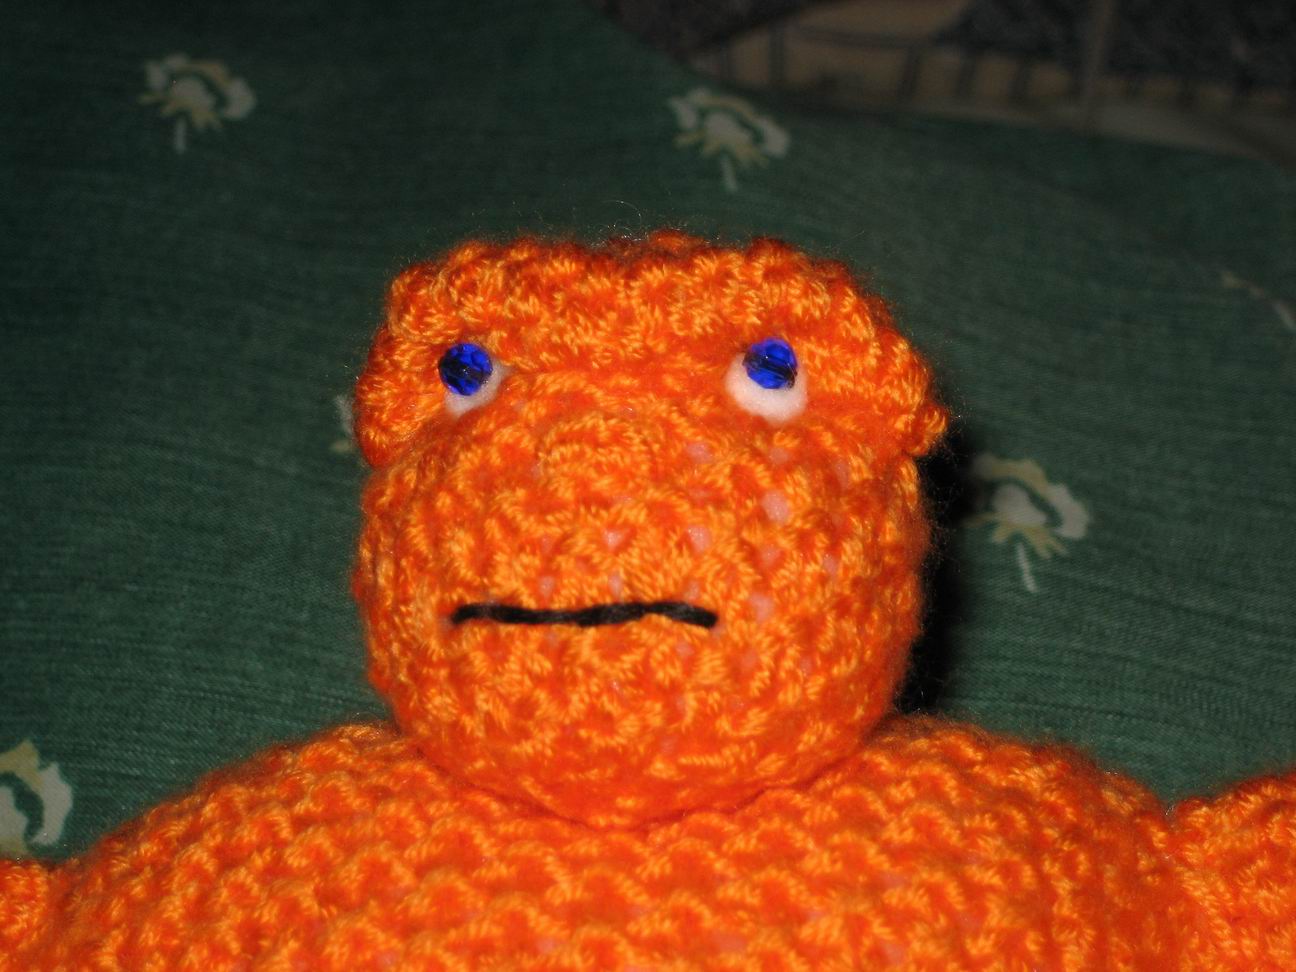
Yes!  I've finally finished writing the pattern!  Whew!  No wonder it took me so long to MAKE him!  I had no idea how much work he was till I wrote it all down.  Being quite a lazy knitter, I would never have tackled such an ambitious project if I'd known in advance how much work it would be.  ;o)  And writing his pattern was even HARDER than MAKING him!!  Sheesh!  All of you pattern designers out there, I take my hat off to you.... or I would if I were wearing one.

But don't let me put you off of making a Thing of your very own.  Although the pattern is pretty long (at least for MY standards ...  I like things I can make in a day or three!), each part of it is fairly simple to do.  I do recommend that you are an experienced knitter, or at least a very adventuresome beginner!  I knit him in the round on two circular needles, but you could use dpns if you are more comfortable with them (they always make me feel that I need two extra hands), and there are no seams to sew, but the head and arms, and brow ridge, are knit separately and sewn on.  Other than knitting and purling, I use k2tog for decreases, and two types of increase stitches, the kfb and the kinc.  Video help for the kinc here
http://www.knittinghelp.com/videos/increases 
scroll about halfway down the page for increasing in the right side of the stitch, where she calls it a KRL (“Knit Right Loop”, and  KLL for the left side of the stitch).  Then it's just knit purl knit purl.... and so on and so on.... till you have a big orange Thing!  :o)


I will be posting the pattern in pdf format very soon (I just need to add photos to it first).  It's my Christmas gift to Marvel fans and the knitters who love them!  :o)

--------------------------------------------------------------------------------------------------------------

  A slightly belated Happy Thanksgiving to all!
--------------------------------------------------------------------------------------------------------------

More Patterns Coming?
 

In other peep news - I've nearly completed a pattern for Nellie the Musical Elephant (because our niece wanted one like her - so I took notes while I made hers - Hurray!).
Also, I'll be posting a pattern for the Unbroken Heart soon as well.


Christmas is nearly upon us and I have LOTS of tasks (as I'm sure you all do), so I don't know how much I'll be able to get to, peep-wise, for the next month, but since I've been so bad at adding posts here, you probably won't notice.  ;o) 
The good news (for some folks) is that I'm planning on making an Elmo and a Cookie Monster for Christmas gifts and I'll be making notes on their
construction as I make them, so apres Christmas, there may be patterns for them soon. 


We wish all of you  
Very Happy Holidays!  
And we hope that you have lots of fun preparing for them.  :o)


Tuesday, November 6, 2007

Why Knitting Peeps is Fun... and info about Hello Kitty and Muppet Peeps


Please check out www.flickr.com/knittycat for larger photos and all of the peeps.


Why knitting Peeps is fun...
  • You don't have to worry about gauge.
  • You rarely have to weave in ends (they just get buried into the peep).
  • You can use any yarn that pleases you, including scraps.
  • They are generally very short term projects (instant gratification - something we knitters don't often get).
  • Pretty much one-size-fits-all.
  • They give you the opportunity to try out new techniques on a small project.
  • They're cute and knitting them makes you a very cheerful knitter!
  • They make the recipients happy!
Okay, they won't keep you warm like socks, a scarf or a sweater, but they will give you the warm fuzzies inside.  :o)


Info about Hello Kitty Peep and Muppet Peeps...
I've been getting requests for patterns for a number of my peeps, and I want to thank you all so much for your kind interest in them!  :o)  I'm so pleased that you like them so much!  As you probably know by now, I don't actually HAVE patterns for them.  You may have already guessed that I'm not much of a pattern writer, since I like to make things up as I'm knitting them.  This makes it a little difficult to reproduce them.  :o)  But I am making an effort to share the things I've learned, and I'm writing up instructions as best as I can for the little guys.  I'll be putting up a "nearly" pattern for the Thing here soon, which has been taking up a LOT of my time, and frying my brain (at the moment, it's fairly complete except for the arms and hands), and then I'll be able to concentrate a little more on instructions for some of the other peeps.  I do have some notes on a couple of the others that just need finishing, and I'll put them up as soon as I'm able.


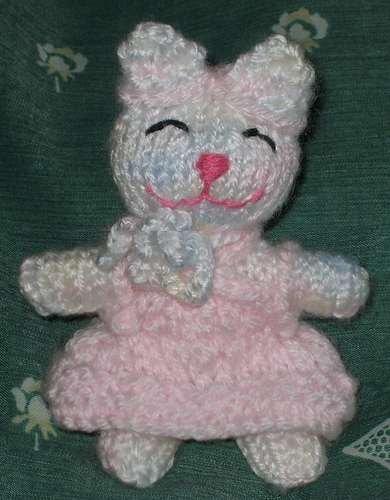
The Hello Kitty that some of you are interested in was actually a very simple variation on the classic peeps, which are made using the double knitting technique.  My recommendation is that you start out by trying out the free pattern for the double-knit bear that is linked to on the intro page (Peeps! and how to make them... Introduction).  It teaches the inside-out double knitting technique really well (that's where I learned it, though I had tried the right-side out technique previously), and it is the starting point for the classic peeps.


Then if you want to make Hello Kitty after that - her legs are a bit shorter and instead of increasing in the center of the front of the face, you increase at the sides, to make her head wide and rather flat, and quite large in proportion to the rest of her body. 

(TIP:  I find it unwieldy to do much increasing and decreasing while the peep is inside out, so I turn them right side out after the arms are made, and place the stitches on two circular needles to do the increasing for the head, or you could use dpns.  Also, I've found that turning goes a lot easier if you turn the arms first.  I also stuff the legs, arms and body at this point, using the back end of a size K crochet hook to push the stuffing into the limbs.)


I used a slip stitch technique to shape her ears so I wouldn't have to knit them separately and sew them on (which I heartily dislike doing), but it would work just as well to make them separately, or pick up stitches at each side of the head for them.  I will eventually provide the slip stitch technique, but I'm not sure when I'll get to it, since there are so many things to do!  So I'd suggest making the ears one of the other ways, and not waiting for me!  :o)   When I do make the bits and pieces separately, I knit them in the round with 2 circular needles so I don't have to make a front and back and sew them together.  The ears on the classic peeps are double knitted while making the heads, and require a break in the yarn for the second ear, but no other sewing.  (Have you gotten the idea yet that I don't like sewing?). 


As to the muppets... I don't have any patterns started yet, but since I am making an Elmo, and possibly a Cookie for Christmas gifts, I will try to make some notes as I go.  Except for Kermie, They are based on the classic peeps, but are larger, and have much larger heads.  Then their eyes, Elmo's nose, and Cookie's cookies were knitted separately in the round, then stuffed and and sewn on.  Kermie was approached totally differently, knitting his body and head in the round in one piece, then each limb knitted in the round, then stuffed and sewn on.


I hope this has been helpful to you.  If you check back here occasionally, I hope to eventually get some patterns done and posted.  But as I keep making new peeps, and I'm as slow as a snail at writing patterns (if a snail wrote patterns) ... I think it is going to be a looong process!  :o) 


Monday, October 22, 2007

The Thing in progress ... Jean Greenhowe Patterns and Kinki Knitting


Please check out www.flickr.com/knittycat for larger photos and all of the peeps.

A Pattern for the Thing?
It's taking me a lot longer than I had hoped to write up a pattern for the Thing.  Making him was a bit more complicated than I'd realized. 


When I approach "sculpting" with knitting, I nearly always create as I go, without much, if any, plan.  I sometimes have a specific image in my mind, or at least the approximate size and shape of the item. And sometimes I have an image or images on paper (like the
Muppet characters, Hello Kitty, the Marvel Comics' character, the Thing,

and Matt's character designs of Ted and NegA-teD, amongst others).


I simply begin, usually at the bottom, and work my way
up, creating the desired shape with increases and decreases as I go.  I am not really conscious of the difficulty of the process till some time has gone by and completion is not yet in sight.  :o)
I'm sure that I wouldn't have tackled some of the projects I've made if I'd thought out the difficulty in advance!  ;o)  I like simple and quick projects!

With the Thing, I was knitting pretty intensively for a few weeks, so I guess he was rather difficult for me.  Hard work, anyway.  Though not difficult to figure out how to manage the shaping.  He's pretty blocky.  It's proving much more complicated and challenging  for me to analyze how I did what I did, and put it in writing, step by step.  I want to say "make this part as tall and wide as desired", but that's not much use to someone who wants to work from a pattern, is it.

So, the upshot is that it's taking me a lot longer than I'd hoped to put it all down in a useable form.  Especially since I no longer have the fellow and have to work from the photos that I took.  Happily, I took a lot of photos!
And here's a collage of some of the in-progress photos that I took during his creation:


I'm still hard at work, analyzing his structure and writing up the steps to create him, in between making other peeps, of course.
I have such admiration for all of those prolific pattern writers out there!  How on earth do you do it?!

Jean Greenhowe Books...

On a happier note - speaking of prolific pattern writers - I recently received two of the absolutely marvelous Jean Greenhowe pattern books that I'd ordered from www.anniesattic.com!

Her knitted characters are just so wonderful!   I especially loved the Little Dumpling Ladies!  (just look at this adorable lady in the YARN SHOP!!)  Besides, I'm rather a "little dumpling lady", myself.  ;o)


And, although I am unlikely to ever actually make anything from one of her patterns (since they are knit in pieces and sewn together and I dislike doing that, and they have LOTS of little details that make them gorgeous, but I don't like to fiddle with), I really enjoy looking at the pics, and thought that I might pick up a tip or two, like a different way of making hair, etc.  Or just more inspiration!  :o)  Just looking at these beautiful creations makes me very happy!  :o)


Kinki Knitting...


I've recently purchased some new circular needles from www.spinblessing.com (I use circulars for all my knitting), and I'm just crazy about them!  They're lovely, silky smooth bamboo, with nice flexible cables, really smooth joins, and SWIVELS inside the joins!  I really love working with them! And they have sizes all the way down to US 0!

The brand is Kinki Amibari (KA), with prices starting from $7.35 for 16 inch needles (the length I use for knitting small items in the round).  The sizes range from US0 up to US17 and most sizes cost under $8.00!  Compare that to Addi Natura's (which are nice but don't have a very smooth join) for $13.00 to $16.00 each!  The Kinki Amibari needles come in several lengths, though I didn't look at the prices of any but the 16" length.

Previously, my favorite needles, and really the only needles I liked to work with, were vintage nylon circs, which haven't been made in a lot of years.  I've been collecting these needles for several years, getting them wherever I could find them, but it's becoming more and more difficult.  So I'm ecstatic to find needles that I'm really enjoying using that are readily available!  Hurray!   Be forewarned though, there is usually a one week delay before the needles are shipped from spinblessing.com since they are ordering them from the manufacturer in Japan.  But they're definitely worth the wait!  :o)
Well, I just talked myself into going and ordering some more!  Yay!

(A little post script:  Please forgive the erratic spacing in this post.  I'm having some trouble with the coding produced by Vox's compose window.)