Wednesday, March 12, 2014
Legs for Eggs with Leggs
Friday, July 29, 2011
Fuzzy Brushed Amigurumi and how they got that way
A Short History of Fuzzy Brushed Amigurumi (crocheted and knitted toys)
In response to a question asked regarding my post of Fuzzy Hello Kitty, I mentioned the history of the Brushed Amigurumi Technique. There was a little confusion (lack of clarity on my part) and the commenter thought it was my technique, but no, I'm not so clever as that. ;o)
(I've noted here my recollections which I have verified as best as I can with net research.)
Who's on first?
As I remember, my first encounter with this idea was in 2007, the first year I was making amigurumi. Wibit, aka Roman Sock had made a fabulous Pomeranian, and described her method of getting that marvellous furry effect by brushing mohair, or mohair blend yarn with a wire pet slicker brush.
http://littlegreen.typepad.com/romansock/2007/09/my-pomerianians.html
http://littlegreen.typepad.com/romansock/2007/09/free-to-a-lovin.html
You can get the free pattern here:
http://littlegreen.typepad.com/romansock/files/pomeranian.pdf
Roman Sock posted a tutorial on how to brush crocheted fabric, including the results with several types of yarns, here:
http://littlegreen.typepad.com/romansock/brushed-crochet.html
The Next Mentions of Using a Pet Slicker Brush
The next mention of this amazing brushed yarn technique, that I remember seeing, was from Roxycraft, who has a terrific photo tutorial on how to achieve a fuzzy look with ordinary yarn and a slicker brush.
And later she did a crochet-along for a very cute fuzzy panda, with video tutorials.
--- links to Roxycraft's crochet along and video tute ----
http://blog.craftzine.com/archive/2009/09/crochet-along_fuzzy_panda_amig.html
http://blog.craftzine.com/archive/2009/09/crochet-along_lesson_one_-_the.html
http://blog.craftzine.com/archive/2009/09/crochet-along_lesson_two_-_ass.html
And there was also chezmichelle's fuzzy critters and information. Possibly around mid 2008? Around the same time that I saw Roxycaft's, or maybe a couple of months before. The wee fellow directly below was crocheted with bamboo yarn, which chezmichelle said gave an excellent result.
Link to chezmichelle and her cute free patterns here:
http://www.suncatchereyes.net/Fuzzball.html
Unfortunately, like many of us who had blogs on vox.com, chezmichelle lost hers when vox disappeared and much of her info seems to be unavailable.
(except for a few bits and pieces, without photos, through the wayback machine's web archive http://www.archive.org )
P.S. to the vox.com issue - I did transfer my blog to blogspot.com - I have never had the time/energy to fix the look of the early posts, whose formatting got rather messed up in the process of the transfer. But at least the content is all there.
What kind of yarn fibers work well?
It seems as though you can use this brushing technique with most yarns, but best to test your yarn by brushing a swatch before starting a project. Some will work better than others. I've seen wonderful results from wool, bamboo and acrylic yarns, and I'm sure other fibers will work well also. Cotton yarn may not yield the results we want, but I haven't tried it so can't say for sure. I've used Caron's Simply Soft, Vanna's Choice and Bernat Softee Baby, acrylic yarns, and all worked well. I'll post a wee limbless kitty soon (hopefully) that I made with Simply Soft. The outcome was very soft and silky. Vanna's Choice came out wonderfully fluffy and fuzzy (see my Fuzzy Hello Kitty).
It's very simple to do, and really magical! :o) A very nice crocheted or knit amigurumi suddenly becomes a fuzzy, furry, cuddly softie! Okay, maybe not suddenly, it's a bit of work to get it to a really fuzzy state, but it's still like magic to me! :o)
xposted to weloveamigurumi.livejournal.com and theknittycat.blogspot.com
Wednesday, July 20, 2011
Ewok to Baby Wookie for John's birthday, April 2011
Before all of my fellow Star Wars fans get mad ....
Just Kidding!! heh heh
......
...................
.........
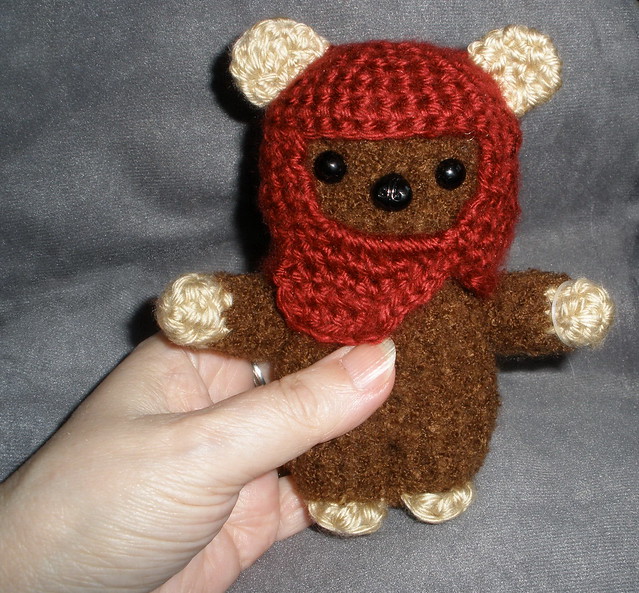
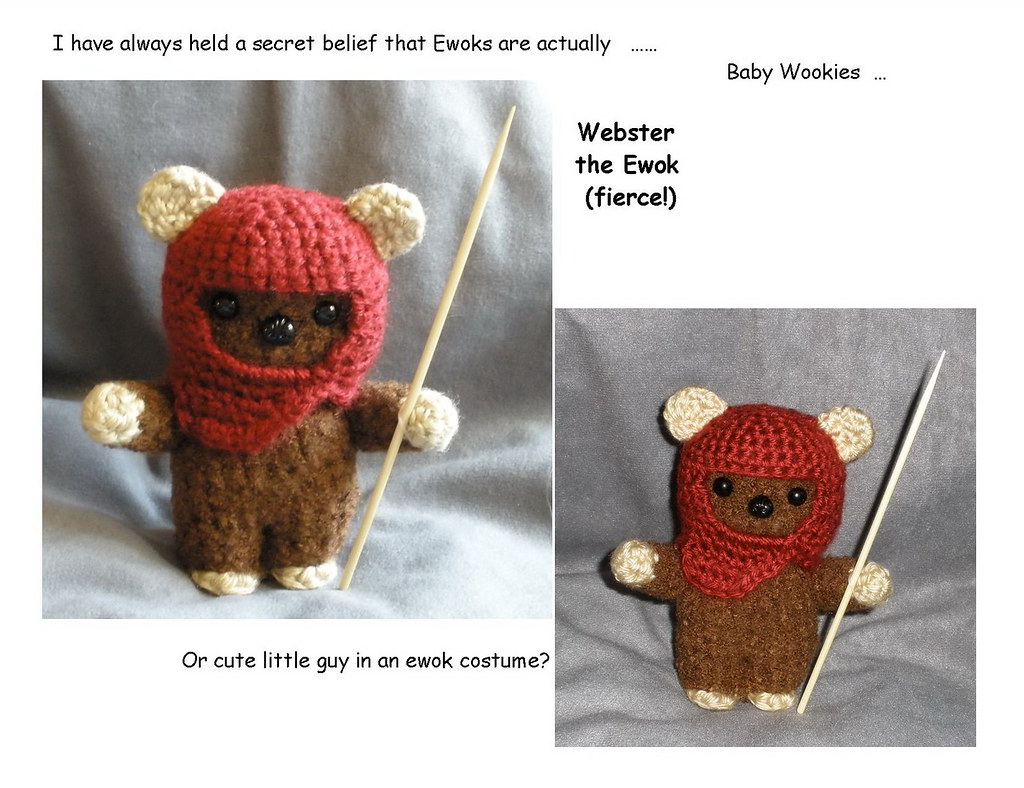
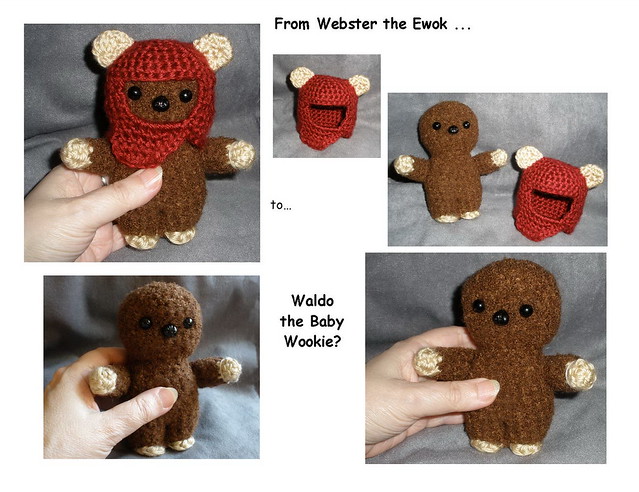
While making this little guy, I thought that his pre ears/helmet look was so cute that I didn't want to sew the helmet/ears on, so I made them removable. And he DOES remind me of a wookie! ;o)
This was my freehand version of the crocheted ewoks that I've seen on the net including chiwaluv’s cutie
http://www.flickr.com/photos/chiwaluvchis/4512124020/
- there's a popular pattern available here:
http://www.etsy.com/listing/62785763/pattern-for-ewok-star-wars-mini
I crocheted him with with TLC Amore, a fuzzy boucle yarn, which is what decided me to use plain yarn and BRUSH Fuzzy Hello Kitty! Yeesh! I thought it was challenging to KNIT with fuzzy yarn!! But when you’re crocheting, you can’t see the STITCHES!!
Since I can't craft at the moment because my hands are healing (hopefully), I thought I'd post a few of the peeps I've been making, and have made in the past, who have been so woefully neglected because I never have a chance to stop knitting/crocheting, long enough to do any posting! ;o) I hope you enjoy looking at them as much as my Hub and I do.
Friday, April 22, 2011
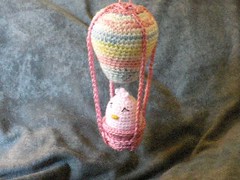
HAPPY EASTER! HAPPY SPRING! and Mimi the Eggy Peep in her Hot Air Balloon
flying in her Hot Air Balloon! :o)
Mimi the Eggy Peep in her Egg Cup
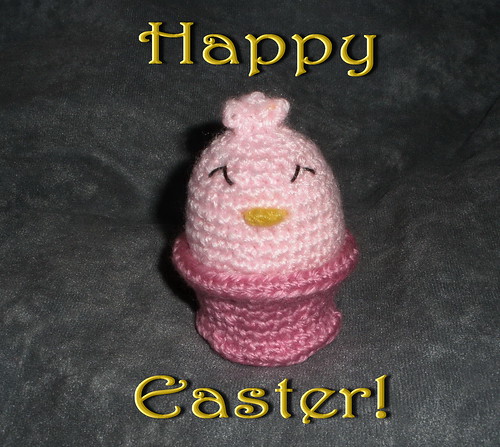
After my "knitting injuries" from my far too zealous Christmas knitting, I've been *gasp* crocheting my wee peeps! Oddly, at the moment, it hurts less to crochet than to knit! But I have to take it slowly. And I've been gaining even MORE respect and admiration for the amazing creations that my crocheting amigurumi-making (toy-making) friends come up with all the time, than I already HAD! I'm finding it a lot harder to crochet ami's than to knit them ! Eeek! heh heh (even though I've been crocheting other things than toys for YEARS!) But I'm happy to be crocheting them till I can knit again. I do have to stick with simple shapes, though. No teensy limbs!!! ha ha! I tried! ;o) I've actually written up two posts chronicling my foray into crocheting toys but haven't yet had the opportunity to get the photos posted and finish them. So that's something to look forward to. ;o)
I'll be posting more of my simple crocheting efforts soon. I just HAD to get these pics of Mimi up right now, since my Hub and I got such a kick out of playing with her while taking them! I hope you'll take a peek at the "Screaming Mimi" video we made. heh heh
and Mimi with her Hot Air Balloon!
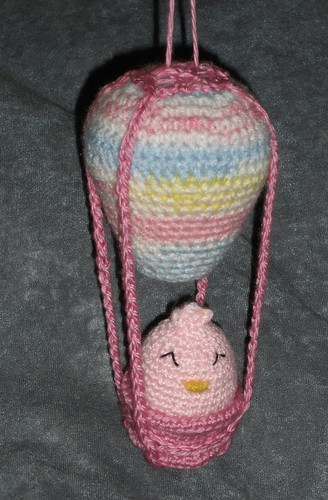
Wheeeeeeee!
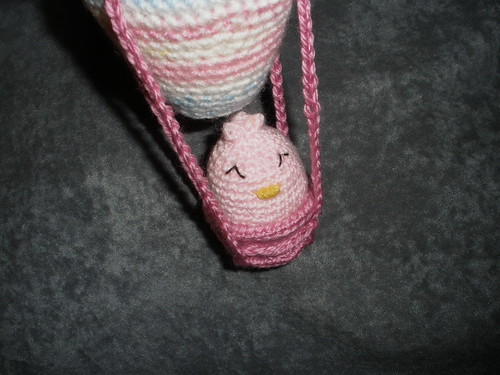
Video of Screaming Mimi Taking a Ride is here!
(be sure to have your sound turned on... hee hee)
Who has a free pattern here!
We're wishing you all a beautiful and Blessed Easter and
HAPPY SPRING!!! :o)
Tuesday, October 5, 2010
Pattern Notes for Stitch - Lilo's Friend
As requested, I'm making my pattern notes for Stitch (of Lilo and Stitch) available.
(for more pics and Stitch's story, please see previous post)
This isn't a complete pattern, but most of it is there and I've spent the past few days cleaning it up and filling in some of the blanks. But it is still an incomplete and untested pattern. But it's free so I guess you're not risking much. ;o)
I won't be making another Stitch, so I won't be bringing this to any further level of completion, but if you find any glaring errors or come up with improvements that you'd like to share, please email or comment and I'll pass the info on. :o)
You'll find the link to the PDF for Stitch's Pattern Notes on my patterns page. You can click on the “Patterns and Tutorials” link at the top of this page or just click here.
Stitch is knit in the round (I used two circular needles) and his torso, 4 arms, and head are knit in one piece. Legs, ears, eyes, nose and color patches are knitted separately. There are no seams. I would not suggest this for a beginning knitter. But determination is a wonderful thing. :o) I have included links for tutorials for some of the techniques I use.
I know that some of you totally enjoy these larger projects (Yesterday, I saw an etsy listing for a crocheted Mickey Mouse, and a Snoopy too, the size of a 10-year-old child!! WOW!), but since I really dislike making these larger ones, I have promised myself to make only the smaller peeps from now on. The larger ones take so much time, and I don't like to devote so much of my time to one project. There are sooooo many more peeps that I want to make, and that I have on my list as requests, So this was my last of this size. It was a labor of love for our nephew.
Back to the wee peeps! Yay!
Oh, my fingers are itching to knit another Hello Kitty ...
I'm just dying to make one after seeing a totally adorable crocheted one that K and J Dolls has available! But I have too many other peeps that I need to get to, so I don't know when I can squeeze her in. Drat!
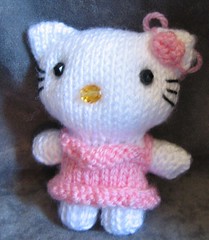
Here's my one and only Hello Kitty, made in my early days of toy knitting (made for an adult - thus the bead bling).
The one by K and J is just wonderful! I love their designs! If you crochet your creations (I don't, because of hand issues), and if you work from patterns (I don't do that either), you should definitely check them out!
A last note... I'm just finishing up a new pattern for Elmo (it will be for Cookie also), using a more standard toy knitting approach than my original doubleknit pattern. Though the original was easy to do, and it was fun to use the doubleknitting, I really prefer the results of doing it this way. It's neater all around. The stitches are tighter and you have better control over the increases and decreases. (doubleknitting by nature is looser because of the slipping of stitches) I'm just finishing making one more Elmo using the pattern (another request, but a good opportunity to test the pattern again) and then I'll post it.
Okay, I know you want to know where to find that giant crocheted Mickey Mouse pattern! Heh heh.
He's here: http://www.etsy.com/shop/Chonticha
along with a bunch of other wonderful designs! Including a super adorable crocheted Lilo AND Stitch pattern! This designer is so talented!
And here's the link for K and J Dolls' Hello Kitty,
http://kandjdolls.blogspot.com/2010/09/kimono-kitty-by-theresa.html
and to the rest of their patterns. I just love everything they do!
http://kandjdolls.blogspot.com
http://kandjdolls.etsy.com/
Oh, pfui! In getting the links, I just read that they’ve had to take down their HK patterns due to a complaint by Sanrio. :o/ Well, you can still use the photos as inspiration, anyway. That’s what I do. ;o) It’s certainly reasonable for Sanrio to stop people from profiting from their property, but wouldn’t it be nicer to ask the transgressors for a percentage of their profit instead of robbing the world of such cuteness? *sigh* She did such a great job of designing those HK’s! :o/
Hope you're all having a great week! It's raining here, and in Sunny Southern California, it's a welcome relief! I love the rain. :o) Especially after that scorching week of Indian Summer we just had.
Wishing you all the Best!
Monday, September 6, 2010
Notes on moving a vox blog to typepad, blogspot and wordpress...
UPDATED WITH MORE DETAILED INFO ON MOVING A VOX BLOG TO BLOGSPOT
After the shock of the news of vox's demise wore off a bit, the concern over the task of moving my blog to another site set in. However, importing this blog to other sites was surprisingly easy! Tweaking the sites to look how I want them to was time consuming (especially doing three at a time!) but the actual import was no problem.
Importing to typepad, with the automatic set-up that vox is providing, was glitchy at first (maybe because I was moving very soon after the notice appeared on our blogs and there may have been a lot of folks going at once), and I did have to restart it, but all the posts and pics moved over with no real issues.
Update...
Warning: I have discovered that importing to blogspot with the wordpress file will bring links to photos in your wordpress library, if the photos in your posts were previously in your vox library (and not at flickr, photobucket, picasaweb or another photosite). What this means is that if you delete your wordpress account, the photos linked to in your posts will disappear. :o/ If your photos were not in your vox library to begin with, this is not a problem. Also, if you just keep the wordpress account, it's not a problem, either. The solution that I will have to apply is to change the link manually for each one affected to point to the photos on flickr.com. Since I have a very small number of posts (though quite photo heavy), this won't be as daunting for me as for many of you with hundreds of posts to go through.
Wordpress
Typepad
I wasn't pleased with Typepad at all. It's too restrictive. And I couldn't even have my own banner at the top of the blog. Their theme choices were very meager and allowed very little tweaking to allow you to make it better or even personalize it. Now this is a free account, so maybe there are more options for paid ones, but since I'm offering my tutorials, and patterns and hints as a service and gift for others, I'd like it to continue when I'm not around to pay a fee to keep the site, so I need a free site. I didn't do much with this site since I disliked the look I was able to achieve there, so I can't speak as to it's functionality.
While putting in this post, I have played with the tools a little and there are some nice posting features. An option to go full screen, so you can see all of your post, instead of being restricted to a little box (wordpress has this option as well, but blogspot only has the option of making the fairly generously sized box longer, not wider), and some additional fonts, that the others don't support, including, Comic Sans MS. As well as having Heading1,2,3 etc, it has a lovely array of font sizes in a strange little wheel (instead of small, normal, large, extra large on blogspot, and paragraph, Heading1, heading2, etc. on wordpress). Presumably you can really tweak the sizes if you have the patience, since you cannot type a number into this box but must use ctrl-shift-uparrow or downarrow to adjust it. My efforts were, however, not successful. I also see an "insert a file" button, that the others don't have, and that has an intriguing sound to it. I'll have to check that out.
Blogspot
Results
1. Sign up for an account at wordpress.com
(yes, I did mean wordpress - you need to get an export file of your blog from wordpress
because blogspot won't import from vox directly)
2. Import your vox blog to wordpress
a. go to your dashboard by clicking the button at the top left of the page
"my blogs" then "dashboard" from the dropdown list
b. on the left side of the dashboard is a list of links, near the bottom is "tools", click this to open the box
c. click on "import" in the box (below "tools")
d. find "vox" in the list in the center and click it
e. fill out the form
"host name" is the name of your vox blog - mine was "knittycat" for knittycat.vox.com
"username" is the email address associated with your vox blog
3. Export your wordpress blog to a file and import it to blogspot following the instructions here:
http://wordpress2blogger.appspot.com/
Ta daaa! You now have your blog copied to both wordpress and
blogspot. Any photos that were in your library on vox are now in your
wordpress library and are being linked to by your blogspot posts.
(This online conversion program may not work for large blogs as the file size limit is 1meg. However an exported blog is all text with links to pictures, so may not be as large as you think. If your blog is larger and this app doesn't work for you, I can't help, but try doing a google search for other ways to convert a wordpress export file to a blogger import file. In the meantime, your blog is safely copied to wordpress.com)
If you have any problems, check the help forums on wordpress.com and blogspot.com, but I didn't have any difficulties with it.
Good Luck! :o)
Wednesday, May 12, 2010
Pudgie in Pajamas for Dorothy's Birthday
It's been ages since I've had a chance to post any amigurumi, though I've been knitting like mad, as always. Last night I was thinking about one that I made for my mum-in-law's birthday last year, and just really had the urge to put him up, soooo....
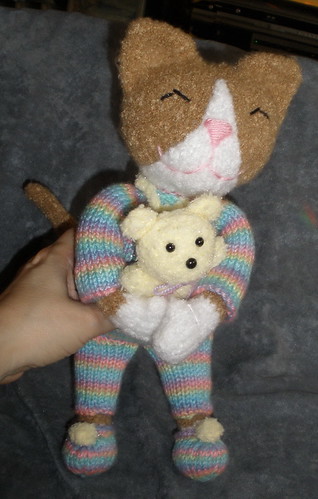
Introducing Pudgie in Pajamas Peep
and his dear friend, Pookie Bear Peep
Pudgie in PJ's always giggles when you tickle his tummy... but the original has a different reaction! heh heh
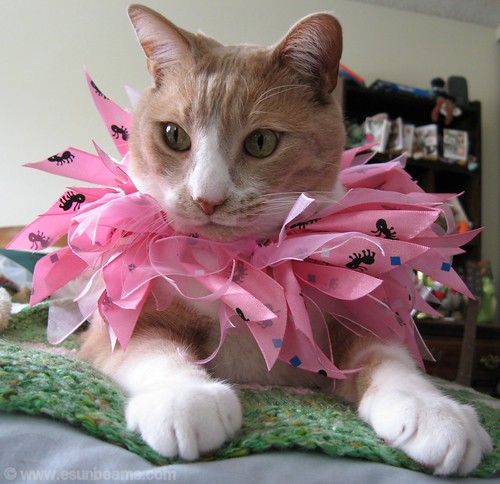
Pudge is our adored giant cat. We're all a bit obsessed with him, and my Mum in law treats him like a grandchild ('cause he IS, of course! heh heh), so I figured she'd enjoy getting her very own Pudge to cuddle with. :o)
......pic of pudge....
Pudgie and Pookie are very best friends and love to be together.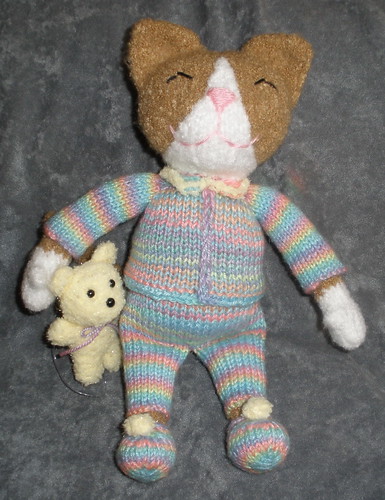
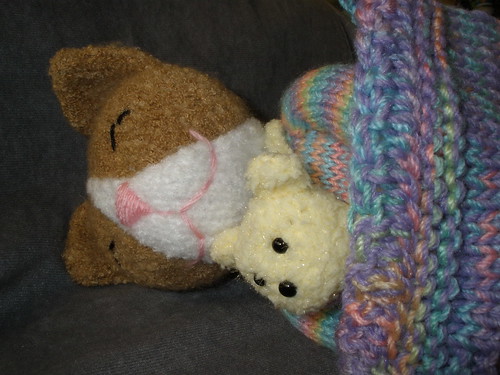
They love to cuddle and giggle and nap, and they love a nice cozy lap to sit in.
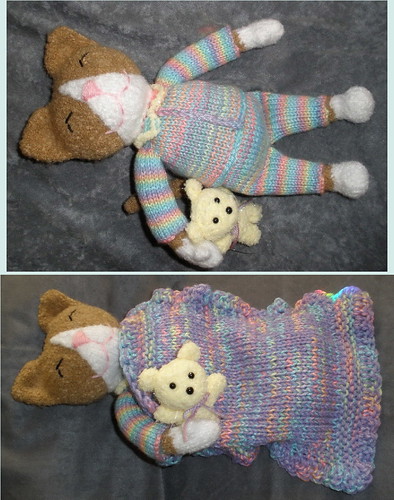
They are so happy, living with their GrandMaw, and they thought that the trip to Scotland was very exciting! (we didn't send them till Christmas, though because of the mail strike in the UK - we didn't want to take any chances!!)
They enjoy having a nice dish of tuna and box of choco, and a nice bowl of honey, and having lovely bedtime stories read to them.
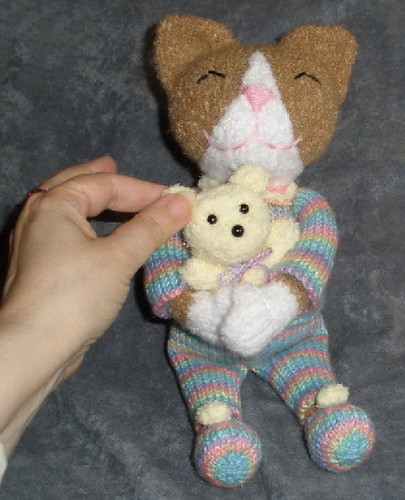
Pookie gets annoyed when you tweak his ear. Oops! 
I made Pudgie freehand (as usual) and didn't make any notes, so I have no pattern plans for him. I am hoping though, that at some point I can get up the energy to share the simple slip stitch technique I used to make his head all in one piece (including ears). I do hate sewing on all those bits and pieces!
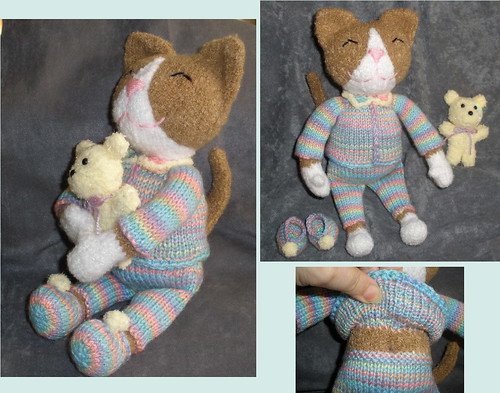
The inspiration for Pudgie in Pajamas was this totally adorable Tabitha kitty design by Debi Birkin.

Isn't she adorable? If you want one of your very own, Debi has a pattern for Tabitha here:
www.debibirkin.com
More pics (if these weren't enough!) on my flickr pages here
www.flickr.com/knittycat
I'm hoping to post her other birthday peep, Kathleen Bunny, soon! I fell in love with Pudgie in PJs and Kathleen Bunny, who are larger than my usual wee peeps (they were made for cuddling), and it was hard to send them so far away, but their grandmaw loves them, so it's all good! :o)
Sunday, April 4, 2010
HAPPY EASTER!! A Plethora of Peeps! :o)
A Plethora of Peeps...
Finally the peeps I've been working on for Easter are DONE!! and ready for giving! :o)
Little Eggy Peeps sitting atop their wee pouch nests
if you missed my previous preview post about this wonderful self-patterning yarn
and a simple pattern it's here.
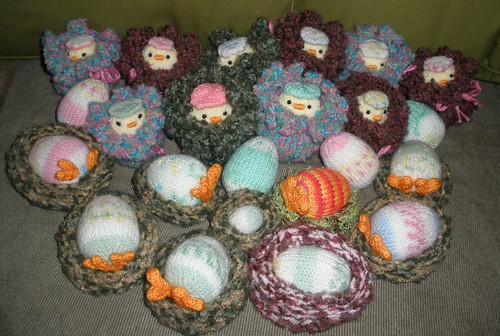
Lots of Eggy Peeps and Easter Eggs and Eggs with Leggs :o)
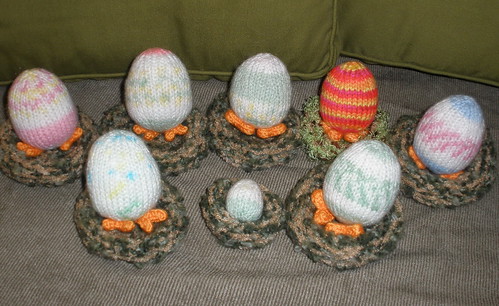
Eggs with Leggs sitting on their little nests. :o)
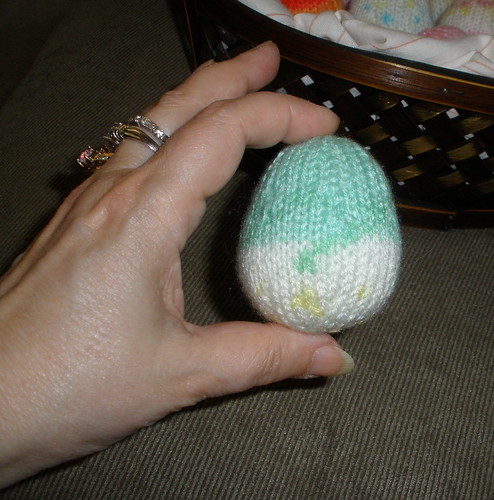
My favorite egg.
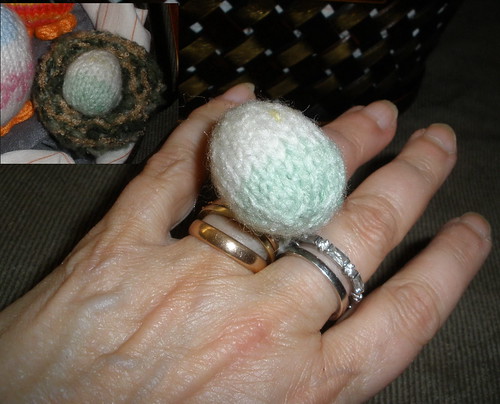
an egg ring pin cushion for my sis. I tried it and it works GREAT! I have to make one for myself! :o)
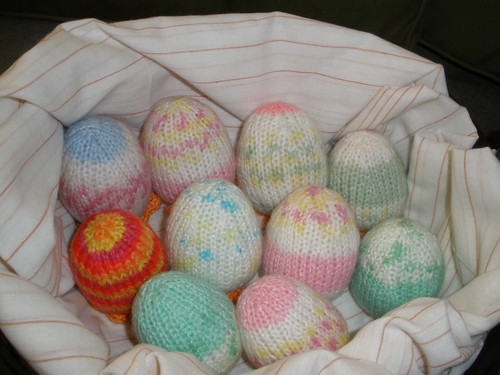
a basket of eggs showing the very cool patterning this great yarn makes!
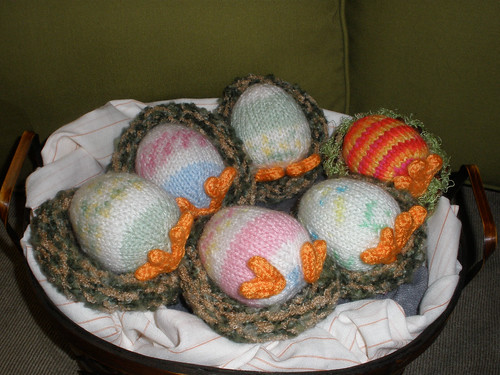
okay I love this photo! heh heh Eggys with Leggys! hee hee

Easter Eggy Peeps tucked inside their little pouch nests
Don't you just LOVE SPRING?!!! Yay! Flowers and baby animals and sunshine!! What could be happier?! :o)
Friday, April 2, 2010
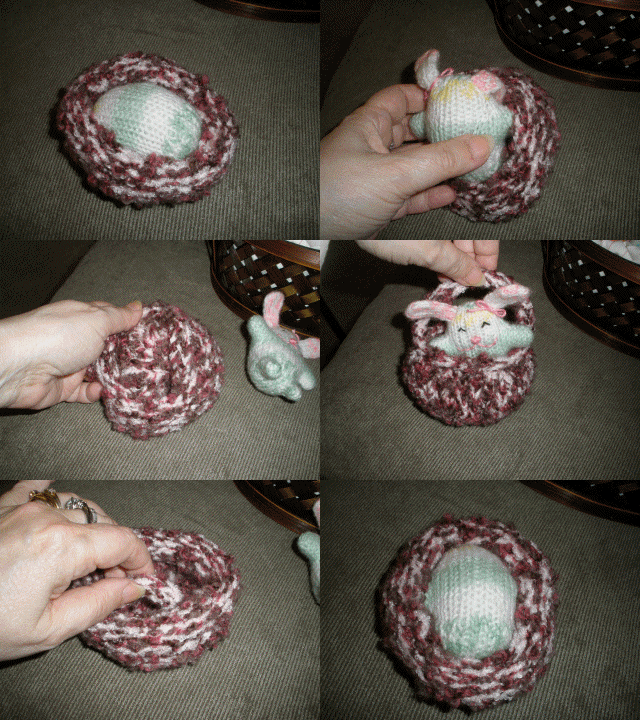
What happens to the eggs the Easter Bunny Brings? :o)
(click on the picture if it's not moving...)
hee hee
Eggy/Bunny Pattern pdf is available here.
When I made this nest (part of the many peeps and accessories made for Easter gifts), I couldn't decide which side should be the outside, because I liked the patterning of the yarns so much on the knit side, but it looked more like a basket than a nest on the knit side... soooooo... And that's how I get my ideas! heh heh
I don't have a pattern for the nest/basket, but it is a simple circle with sides, made with two bulky textured yarns held together (in this case Bernat's Soft Boucle and TLC Amore). See the directions for the Eggy Peeps in the previous entry. It will be the same, up to the point where you begin to decrease. You won't do any decreasing. Just keep knitting around till it's the height you want, making sure it's enough to get the top to curl down (sometimes stockinette's inherent curl is your friend), and then bind off. You don't want a loose bind off for this. The handle of the basket is simply i-cord. Make sure it's the length of the curve that you want to tuck it into, so it won't show.
Saturday, February 27, 2010
Eggy Peeps, Pretty Easter Egg Yarn, And Free Pattern!! :o)
I recently got some beautiful self-patterning yarn, Bernat Baby Jacquard, to make some socks and while looking at the socks I had made from one of the skeins, I thought that it would make wonderful Easter Eggs! :o) Soooo....
Chiwaluv and I were "chatting" about the Easter Eggs and Eggy Peeps, that I'm making for Easter gifts, and it occured to me that you folks might like to know about the yarn for your Easter knitting and crocheting.
I'm including notes for how I knit my eggs, plus a few egg pattern links, both in crochet and knit ....
Easter Eggs and Eggy Peeps in progress
inset is the pattern on the bottom of the egg
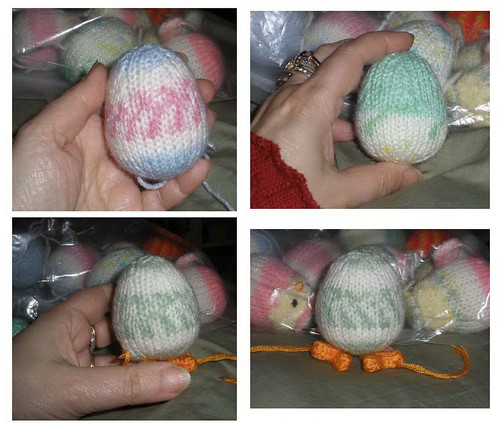
The one with feet (in progress - ends still sticking out and feet just pinned on) is from the
same skein as the hatching egg!

a bunch of eggs and one Eggy Bunny in progress
(the orange and yellow striped egg is made with a variegated yarn
-Red Heart Kids, I think- for a special nephew who adores those colors)
This Bernat Baby Jacquard yarn is just terrific! From one skein, you will get lots of eggs, each different from the others. The eggs I've made (so far) are from three different colorways, but just from one skein, I've gotten several egg designs with real variety! :o)
I'm also making little nests and bags for the peeps. Nothing so elaborate as last year, since I'm still quite sick, but I LOVE making these sweet eggies!
Knitting the self patterning yarn in the round creates these wonderful patterns that they were designed for, but it would be very interesting to crochet with it (or knit the eggs flat) to see what kind of patterning that makes, too! :o)
My version of eggs is super simple. They could be done on dpns or converted to flat but I knit them in the round on two circular needles. If you haven't tried two circs yet, this would be a good opportunity to try them on such small projects - it's soooo much easier using the two circs than working with dpns, and it's much easier on your hands as well. Of course that's just my opinion that they're easier to work with - 'cause I'm not coordinated enough to use dpns. ;o)
Pattern Notes:
Using Bernat Baby Jacquard or other self patterning or variegated yarn and (2) U.S. sz 3 circular needles...
I make my eggs like I'm making a ball for the first half, then just add a couple of extra plain rounds to the middle (in addition to the couple of plain rounds you normally do) to elongate it. Then for the decreasing
rounds, I do two plain rounds between the decrease rounds instead of one which makes the tapered top.
Disclaimer: These pattern notes have not been tested, so if you're unsure, use one of the patterns written by the experts that I've linked to at the bottom of this post.
1. Using two circular needles (I'm using U.S. sz 3's), cast on 6 st
with Judy Becker's Magic Cast On
(or cable c/o 3 on 1 ndl, k acr, p/u 3 on 2nd ndl from bottom of cast on)
2. Inc in ea st (inc1, k1) arnd (12)
3. K arnd
4. (Inc1, k2) arnd (18)
5. K arnd
6. (Inc1, k3) arnd (24)
7. K arnd
Cont. in this manner, increasing 6 st ev rnd till you reach the
diameter you want (I went to 36 stitches)
8. (Inc1, k4) arnd (30)
9. K arnd
10. (Inc1, k5) arnd (36)
11. K arnd 8 or 9 times
Start decreasing in the same way that you increased, but with an extra
knit rnd between (decrease 6 st ev third rnd)...
Oh and start stuffing before the hole gets small! ;o)
12. (K2tog, k4) arnd (30 st)
13. K arnd 2x
14. (K2tog, k3) arnd (24 st)
15. K arnd 2x
16. (K2tog, k2) arnd (18 st)
17. K arnd 2x
18. (K2tog, k1) arnd (12 st)
19. K arnd (only 1x to make it a little more rounded at the top)
20. K2tog arnd (6 st)
Kitchener st closed (or close as you would normally close a ball)
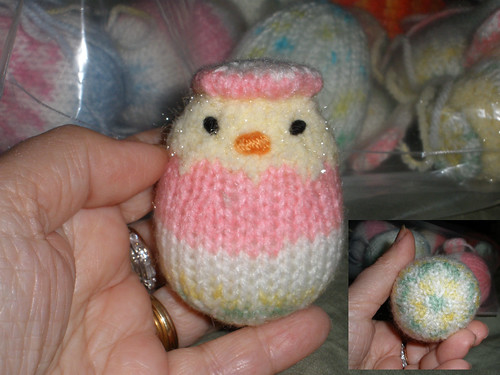
Hatching Easter Eggy Peeps
Make the same as the eggs, but switch to yellow yarn (I used a fuzzy yarn) after the first decrease round.
(I carry the egg yarn up through the egg to make the cap in one piece with the egg, instead of breaking and reattaching it.)
Add a cap by knitting a disk and sewing it on, or in one piece as follows:
When you have decreased down to 6 st again, switch to egg yarn
rpt steps 2-7 of the beginning of the egg pattern
Then decrease back down again as you would decrease for a ball.
1. (K2tog, k2) arnd (18)
2. K arnd
3. (K2tog, k1) arnd (12)
4. K arnd
5. (k2tog arnd (6)
6. Kitchener st closed (or use your favorite method of closing)
Flatten the shape you have just made and stitch it down with the tail of yarn.
Add a few bits of yellow below the start of the yellow rounds with duplicate stitch to make it look jagged, or you can slip some of the stitches on the first round of yellow.
And here are free patterns from the experts...
Littlecottonrabbits' pattern includes really beautiful fairisle ones!
(I don't like to do colorwork, so I LOVE self-patterning yarn!!)
Jean Greenhowe's free pattern (knit flat)
http://www.jeangreenhowe.com/Images/Novelty_Eggs.pdf
Littlecottonrabbit's free pattern knit flat with fairisle instructions for pretty colorwork!
http://littlecottonrabbits.typepad.co.uk/free_knitting_patterns/
Curlypurly's, purlbee's and emmyknits, in-the-round on dpns free patterns
http://www.curlypurly.com/eggs.html
http://www.purlbee.com/knitted-easter-eggs/
http://emmyknits.wordpress.com/2009/04/11/easy-knitted-easter-eggs/
And here's a couple of crochet patterns that I found, too!:
http://knittingcrochet.suite101.com/article.cfm/easter_egg_crochet_pattern
http://www.thecraftytipster.com/amigurumi-egg.html
I bought the yarn here:
http://www.joann.com/joann/catalog/productdetail.jsp?pageName=search&flag=true&PRODID=xprd561154
Spring is coming! Yay!
Sunday, February 14, 2010
HAPPY VALENTINE'S DAY! from Lambie Loveykins
We think she looks like the girls who used to sell candy and flowers at the theaters, etc. in the 30's/40's. :o)
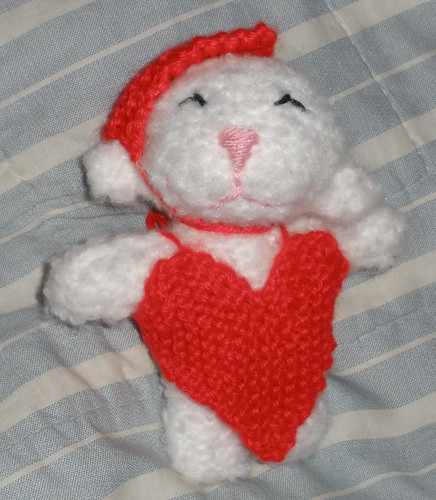
Her heart-shaped hat...

Sorry, the bow from her little hat is a bit messy in the pic, and you can't see the back very well. I took these in a hurry because I just finished her last night! Yeeks! close one! ;o)
(being sick is putting me way behind in my knitting... and Easter is coming!!)
Hope you all have a day filled with Love! We send lots of Love to all of you and to your dear ones!
Hugs from theknittycat
more peeps of my peeps:
on flickr.com http://www.flickr.com/knittycat
and ravelry.com http://www.ravelry.com/projects/theknittycat


