I recently got some beautiful self-patterning yarn, Bernat Baby Jacquard, to make some socks and while looking at the socks I had made from one of the skeins, I thought that it would make wonderful Easter Eggs! :o) Soooo....
Chiwaluv and I were "chatting" about the Easter Eggs and Eggy Peeps, that I'm making for Easter gifts, and it occured to me that you folks might like to know about the yarn for your Easter knitting and crocheting.
I'm including notes for how I knit my eggs, plus a few egg pattern links, both in crochet and knit ....
Easter Eggs and Eggy Peeps in progress
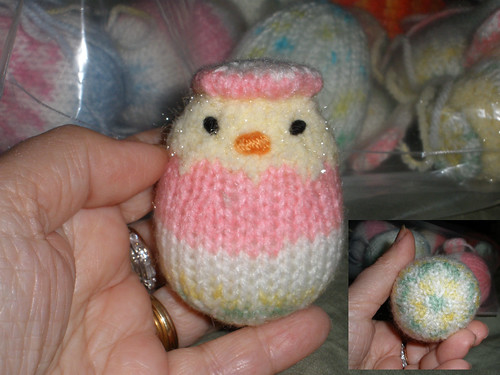
inset is the pattern on the bottom of the egg
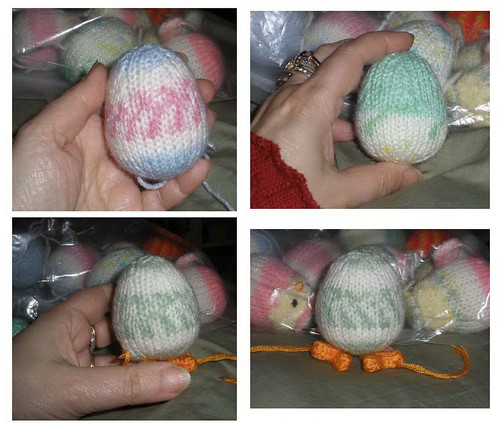
The one with feet (in progress - ends still sticking out and feet just pinned on) is from the
same skein as the hatching egg!
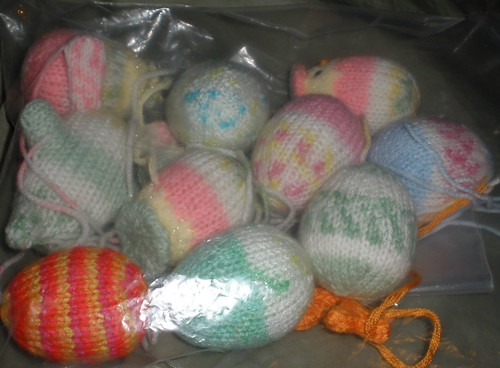
a bunch of eggs and one Eggy Bunny in progress
(the orange and yellow striped egg is made with a variegated yarn
-Red Heart Kids, I think- for a special nephew who adores those colors)
This Bernat Baby Jacquard yarn is just terrific! From one skein, you will get lots of eggs, each different from the others. The eggs I've made (so far) are from three different colorways, but just from one skein, I've gotten several egg designs with real variety! :o)
I'm also making little nests and bags for the peeps. Nothing so elaborate as last year, since I'm still quite sick, but I LOVE making these sweet eggies!
Knitting the self patterning yarn in the round creates these wonderful patterns that they were designed for, but it would be very interesting to crochet with it (or knit the eggs flat) to see what kind of patterning that makes, too! :o)
My version of eggs is super simple. They could be done on dpns or converted to flat but I knit them in the round on two circular needles. If you haven't tried two circs yet, this would be a good opportunity to try them on such small projects - it's soooo much easier using the two circs than working with dpns, and it's much easier on your hands as well. Of course that's just my opinion that they're easier to work with - 'cause I'm not coordinated enough to use dpns. ;o)
Pattern Notes:
Using Bernat Baby Jacquard or other self patterning or variegated yarn and (2) U.S. sz 3 circular needles...
I make my eggs like I'm making a ball for the first half, then just add a couple of extra plain rounds to the middle (in addition to the couple of plain rounds you normally do) to elongate it. Then for the decreasing
rounds, I do two plain rounds between the decrease rounds instead of one which makes the tapered top.
Disclaimer: These pattern notes have not been tested, so if you're unsure, use one of the patterns written by the experts that I've linked to at the bottom of this post.
1. Using two circular needles (I'm using U.S. sz 3's), cast on 6 st
with Judy Becker's Magic Cast On
(or cable c/o 3 on 1 ndl, k acr, p/u 3 on 2nd ndl from bottom of cast on)
2. Inc in ea st (inc1, k1) arnd (12)
3. K arnd
4. (Inc1, k2) arnd (18)
5. K arnd
6. (Inc1, k3) arnd (24)
7. K arnd
Cont. in this manner, increasing 6 st ev rnd till you reach the
diameter you want (I went to 36 stitches)
8. (Inc1, k4) arnd (30)
9. K arnd
10. (Inc1, k5) arnd (36)
11. K arnd 8 or 9 times
Start decreasing in the same way that you increased, but with an extra
knit rnd between (decrease 6 st ev third rnd)...
Oh and start stuffing before the hole gets small! ;o)
12. (K2tog, k4) arnd (30 st)
13. K arnd 2x
14. (K2tog, k3) arnd (24 st)
15. K arnd 2x
16. (K2tog, k2) arnd (18 st)
17. K arnd 2x
18. (K2tog, k1) arnd (12 st)
19. K arnd (only 1x to make it a little more rounded at the top)
20. K2tog arnd (6 st)
Kitchener st closed (or close as you would normally close a ball)
Hatching Easter Eggy Peeps
Make the same as the eggs, but switch to yellow yarn (I used a fuzzy yarn) after the first decrease round.
(I carry the egg yarn up through the egg to make the cap in one piece with the egg, instead of breaking and reattaching it.)
Add a cap by knitting a disk and sewing it on, or in one piece as follows:
When you have decreased down to 6 st again, switch to egg yarn
rpt steps 2-7 of the beginning of the egg pattern
Then decrease back down again as you would decrease for a ball.
1. (K2tog, k2) arnd (18)
2. K arnd
3. (K2tog, k1) arnd (12)
4. K arnd
5. (k2tog arnd (6)
6. Kitchener st closed (or use your favorite method of closing)
Flatten the shape you have just made and stitch it down with the tail of yarn.
Add a few bits of yellow below the start of the yellow rounds with duplicate stitch to make it look jagged, or you can slip some of the stitches on the first round of yellow.
And here are free patterns from the experts...
Littlecottonrabbits' pattern includes really beautiful fairisle ones!
(I don't like to do colorwork, so I LOVE self-patterning yarn!!)
Jean Greenhowe's free pattern (knit flat)
http://www.jeangreenhowe.com/Images/Novelty_Eggs.pdf
Littlecottonrabbit's free pattern knit flat with fairisle instructions for pretty colorwork!
http://littlecottonrabbits.typepad.co.uk/free_knitting_patterns/
Curlypurly's, purlbee's and emmyknits, in-the-round on dpns free patterns
http://www.curlypurly.com/eggs.html
http://www.purlbee.com/knitted-easter-eggs/
http://emmyknits.wordpress.com/2009/04/11/easy-knitted-easter-eggs/
And here's a couple of crochet patterns that I found, too!:
http://knittingcrochet.suite101.com/article.cfm/easter_egg_crochet_pattern
http://www.thecraftytipster.com/amigurumi-egg.html
I bought the yarn here:
http://www.joann.com/joann/catalog/productdetail.jsp?pageName=search&flag=true&PRODID=xprd561154
Spring is coming! Yay!