flickr.com/knittycat


Tips & Techniques for Knitting theknittycat's Peeps and Other Toys

Showing posts with label hand made. Show all posts

Friday, July 29, 2011

Fuzzy Brushed Amigurumi and how they got that way


A Short History of Fuzzy Brushed Amigurumi (crocheted and knitted toys)

In response to a question asked regarding my post of Fuzzy Hello Kitty, I mentioned the history of the Brushed Amigurumi Technique.  There was a little confusion (lack of clarity on my part) and the commenter thought it was my technique, but no, I'm not so clever as that.  ;o)


(I've noted here my recollections which I have verified as best as I can with net research.)


Who's on first?

As I remember, my first encounter with this idea was in 2007, the first year I was making amigurumi.  Wibit, aka Roman Sock had made a fabulous Pomeranian, and described her method of getting that marvellous furry effect by brushing mohair, or mohair blend yarn with a wire pet slicker brush.
http://littlegreen.typepad.com/romansock/2007/09/my-pomerianians.html
http://littlegreen.typepad.com/romansock/2007/09/free-to-a-lovin.html

Roman Sock's adorable Crocheted and Brushed Pomeranian

You can get the free pattern here:
http://littlegreen.typepad.com/romansock/files/pomeranian.pdf

Roman Sock posted a tutorial on how to brush crocheted fabric, including the results with several types of yarns, here:
http://littlegreen.typepad.com/romansock/brushed-crochet.html


The Next Mentions of Using a Pet Slicker Brush

The next mention of this amazing brushed yarn technique, that I  remember seeing, was from Roxycraft, who has a terrific photo tutorial on how to achieve a fuzzy look with ordinary yarn and a slicker brush.
 ---link to Roxycraft's photo tute ---
http://tamiesnow.typepad.com/roxycraft/2009/06/tutorial-making-brushed-amigurumi.html

And later she did a crochet-along for a very cute fuzzy panda, with video tutorials.
(sorry, that pic won't post - click on the first link to see the panda)


--- links to Roxycraft's crochet along and video tute ----
http://blog.craftzine.com/archive/2009/09/crochet-along_fuzzy_panda_amig.html
http://blog.craftzine.com/archive/2009/09/crochet-along_lesson_one_-_the.html
http://blog.craftzine.com/archive/2009/09/crochet-along_lesson_two_-_ass.html


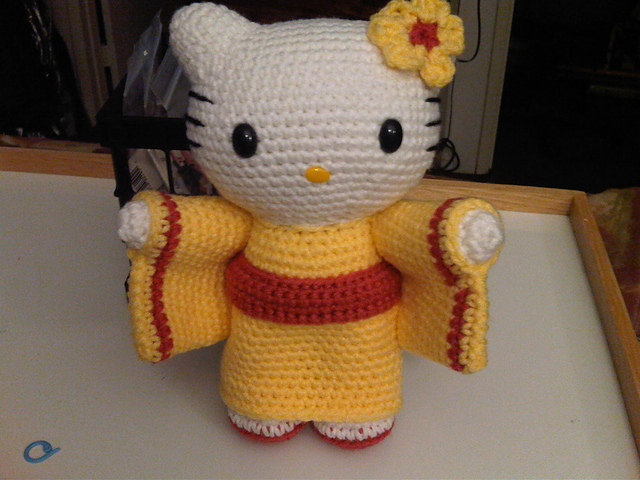
And there was also chezmichelle's fuzzy critters and information.   Possibly around mid 2008? Around the same time that I saw Roxycaft's, or maybe a couple of months before.  The wee fellow directly below was crocheted with bamboo yarn, which chezmichelle said gave an excellent result.


Link to chezmichelle and her cute free patterns here:
http://www.suncatchereyes.net/Fuzzball.html

Unfortunately, like many of us who had blogs on vox.com, chezmichelle lost hers when vox disappeared and much of her info seems to be unavailable.
(except for a few bits and pieces, without photos, through the wayback machine's web archive http://www.archive.org )

P.S. to the vox.com issue - I did transfer my blog to blogspot.com - I have never had the time/energy to fix the look of the early posts, whose formatting got rather messed up in the process of the transfer.  But at least the content is all there.


What kind of yarn fibers work well?

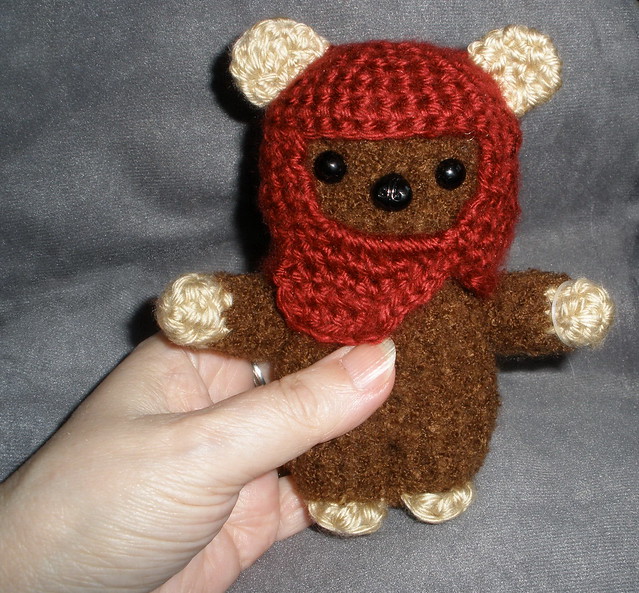
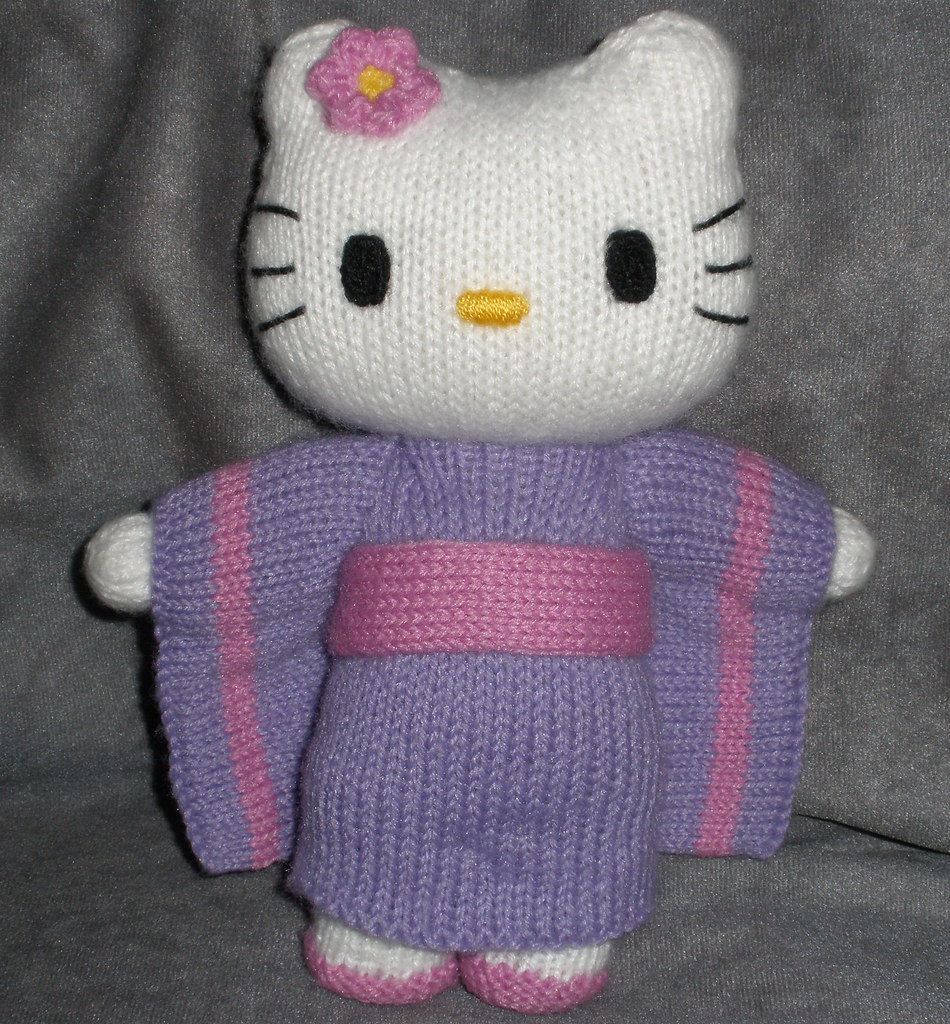
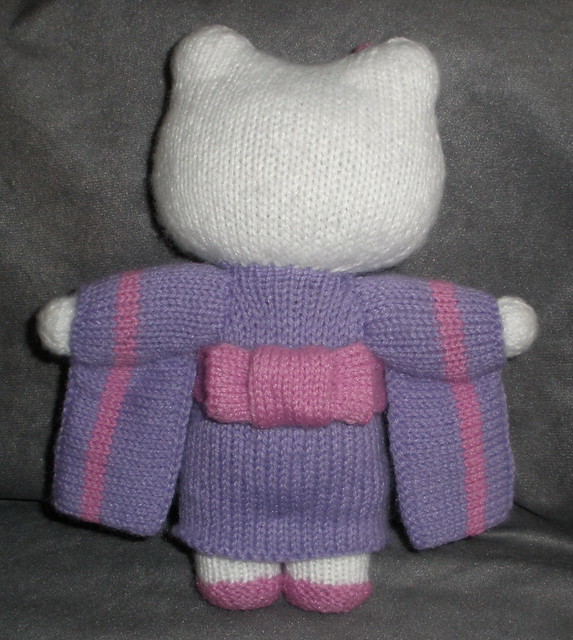
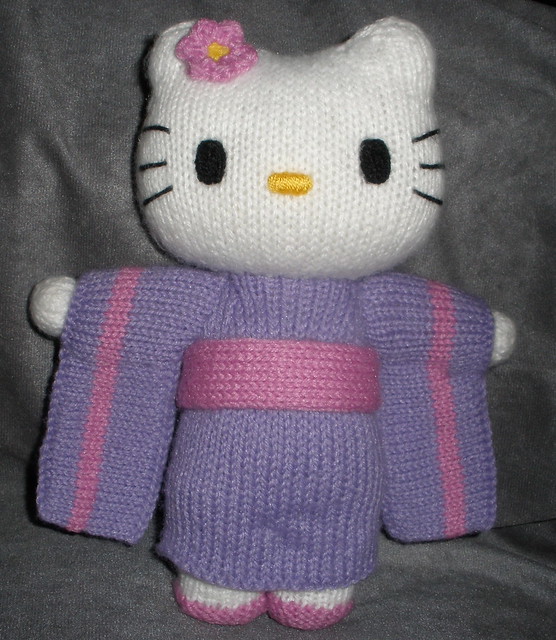
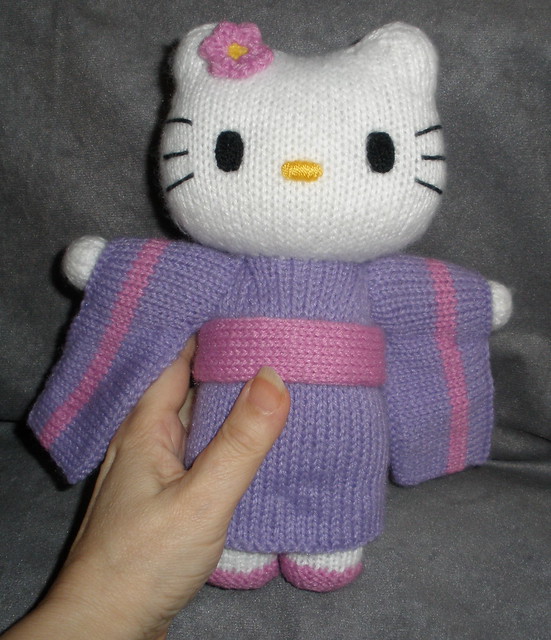
It seems as though you can use this brushing technique with most yarns, but best to test your yarn by brushing a swatch before starting a project.   Some will work better than others.  I've seen wonderful results from wool, bamboo and acrylic yarns, and I'm sure other fibers will work well also.  Cotton yarn may not yield the results we want, but I haven't tried it so can't say for sure.  I've used Caron's Simply Soft, Vanna's Choice and Bernat Softee Baby, acrylic yarns, and all worked well.  I'll post a wee limbless kitty soon (hopefully) that I made with Simply Soft.  The outcome was very soft and silky.  Vanna's Choice came out wonderfully fluffy and fuzzy (see my Fuzzy Hello Kitty).


It's very simple to do, and really magical!  :o)  A very nice crocheted or knit amigurumi suddenly becomes a fuzzy, furry, cuddly softie!  Okay, maybe not suddenly, it's a bit of work to get it to a really fuzzy state, but it's still like magic to me!  :o)


xposted to weloveamigurumi.livejournal.com and theknittycat.blogspot.com

theknittingkitty for theknittycat

Wednesday, July 20, 2011

Ewok to Baby Wookie for John's birthday, April 2011


"I have always held a secret belief
that Ewoks are actually ….. 
 ......  Baby Wookies"


Before all of my fellow Star Wars fans get mad ....


Just Kidding!!  heh heh

......


...................


.........


While making this little guy, I thought that his pre ears/helmet look was so cute that I didn't want to sew the helmet/ears on, so I made them removable.  And he DOES remind me of a wookie!  ;o)

This was my freehand version of the crocheted ewoks that I've seen on the net including chiwaluv’s cutie
http://www.flickr.com/photos/chiwaluvchis/4512124020/
 - there's a popular pattern available here:
http://www.etsy.com/listing/62785763/pattern-for-ewok-star-wars-mini 

I crocheted him with with TLC Amore, a fuzzy boucle yarn, which is what decided me to use plain yarn and BRUSH Fuzzy Hello Kitty! Yeesh! I thought it was challenging to KNIT with fuzzy yarn!! But when you’re crocheting, you can’t see the STITCHES!!


Since I can't craft at the moment because my hands are healing (hopefully), I thought I'd post a few of the peeps I've been making, and have made in the past, who have been so woefully neglected because I never have a chance to stop knitting/crocheting, long enough to do any posting!  ;o)  I hope you enjoy looking at them as much as my Hub and I do. 


theknittingkitty for theknittycat

Tuesday, January 4, 2011

Hello Kitty in Kimono - Crafty Christmas 2010

=^..^=

Hello Kitty in Kimono for Jennea - from my Crafty Christmas 2010

I put in a sneak peek of Hello Kitty in my last post (for New Year's Eve).
A very simple animation. :o)  But this post will give you the full intro.

When I was getting my HK photos ready to upload to my photostream on flickr, I noticed that if I put a few of them together, it made her move, and even bow (just a happy accident) ... I couldn't resist! I just had to animate her. ;o)


Isn't that FUN?!  I love animated gifs!  :o)


Hello Kitty in Kimono for Jennea
(holding still for her closeup)


a better view of her sleeves, and from the back


How to Poorly Plan Christmas Crafts
HK in Kimono is one of the multitude of projects that, two months ago, I suddenly, and unexpectedly, found that I needed to make for Christmas.   Since time was very short, I very cleverly designed projects that were much larger and more involved than my usual ones!  arrrgh!  And I'm not a speedy peepmaker!


size of HK in Kimono compared to
my first HK for Nicole


 (from my first year of peepmaking, 2007) 

 
So after making this "brilliant" plan and working like a madwoman for weeks, nearing the deadline I realized that the peep I had been working on for a good portion of that time (several weeks) turned out to be inappropriately delicate for her intended recipient, our lively, and very young niece, Mia.   So approaching the last minute, I had to start all over with another project for her!  (you'll be introduced to her replacement, Betty the Baby Bot in another post).  It happens that I totally LOVED what I wound up making for her (and so did she), but it would have been much more fun to have made it more leisurely.

It's been very challenging, but, working night and day, I got MOST of the projects done.  (yeah. I do NOT recommend crafting this way - made me really sick)  My Dear Hub's Piglet got postponed till after, and so did the Meowth for our wonderful nephew, who sweetly offered to let me make his after Christmas, so I wouldn't be so pressured.  :o)  Wasn't that a lovely Christmas gift?  I made him a simple thing (the pokemon character, Electrode - a red and white ball with a face) to tide him over till I make Meowth, and so he'd have something to open from us on Christmas Day, and now I'm off to make a tiny Meowth!  ;o)  And finish Piglet... and make my Hub yet another Lambie!!  He LOVES those lambies!  heh heh

Peeking at Peeps
Here's a peek at the projects I made for Christmas (all made in 2 months - there were four more, but those had already been sent to Scotland when I took this photo).  Please forgive the poor quality of the photo. I was in such a hurry at that point that I'm just grateful to have any pics at all!  Their individual photos are better, and I'll be sharing those in future posts.

 a wee peek of the group on the couch, waiting to be packaged up for gift giving
- toys for the kids and ornaments and earrings for the adults.

(yes, I did a lovely job of composing.   I especially love the disordered mass of ornaments.   ick.)

The gifts consisted of

5 large peeps:
Betty Baby Bot, Lizabeth Cuddle Lambie, Rosalie Flying Piglet, HK in Kimono, and Maria Teresa, the large doll that Baby Bot was replacing (who still needs her hair sewn on before she becomes a gift).

4 medium peeps
to Scotland (not in photo)
Elmo (who was actually finished in October), Dorothy Goldfish, Goldfish "Bowl", and Mirabelle Mousie

3 small peeps:
Terence the Terrapin, a Christmas tree with Santa sack, and the Blue Guy from the HTC cell phone commercials (my Hub loved those commercials, and that little guy!)

and 13 ornaments for the adults
No, your eyes don't deceive you. There are only 9 ornaments in that photo. I made 4 more after I took that pic.  (They look a lot prettier when they're not mushed up in a mass!  heh heh)

Plus 4 pairs of crystal earrings.

Whew!


And now some background about Hello Kitty in Kimono!  Finally!  :o)

My Inspiration
I was inspired to make this peep when I saw this adorable amigurumi Kimono Kitty
from a Kimono Kitty pattern written by kandjdolls. (brilliant designers, by the way!).

The Kimono Kitty was crocheted, and of course I'd be knitting mine, but that's not a problem since I was only using the photo as inspiration.  (as most of you know, I knit everything freehand, without patterns.)

Although flawed, I'm quite pleased at how HK in Kimono turned out.  I made her in Jennea's favorite color, purple!  And Jennea, a big HK fan, loved her!  :o)  Yay!!  If I'd had more time I'd have liked to make an accessory for her. I was thinking that a parasol would be super cute!  So if I ever have some spare time for it ... Yeah. Sure. Heh heh

Eyes and How Not to Make Them
I had some trouble making HK's eyes satisfactorily, and have discovered that Lion Brand Microspun is NOT a good choice for knotted yarn eyes (see my yarn knot eyes tutorial).  Since it’s so loosely spun, the knots don’t cohere into a “fused” ball, but separate. Soooo… back to the drawing board.

Since her eyes are oval and I didn't have any glass eyes in that shape, I resorted to a new method that, recently, I’ve been utilizing on occasion - flattened knitted ball eyes. I made a pair with Red Heart Lustersheen (a very light sport or fingering weight yarn), and those worked just fine. This is the first time I’ve made oval ones instead of round ones, but it wasn’t a problem. :o)


One more thing to add before I close...

No Pattern Available but Hints on How to Make Her
Several people have already asked me for a pattern for this knit Kimono Kitty, but I made no notes at all while knitting her (I was in too much of a hurry to stop and write what I was doing), and I won't be writing anything up for her.  But she is made up of very simple shapes;

Two tubes for her legs, a tapered tube for her body and kimono, and wide flattened tubes for her sleeves (stuffing a narrow tube shape at one end of each sleeve for her arms), with white balls on the ends for paws (or you could make whole white arm tubes and tuck them into one side of each sleeve). And a rounded 3D rectangle for her head - kind of a shallow box shape.  It should really be a bit more squared than I made it - similar width to height, I was so focused on not making it round that I made it a bit wider than I should have, but I still love her.  :o)  And rounded triangles for ears.

That, of course isn't quite the way I made her since I hate to sew bits together. Except for her arms, she's all one piece, and her paws are one piece with her arms.


More Posts?
I'm really hoping to make time to post more often, and get caught up on sharing my backlog of finished peeps. They feel very neglected not to have had their day on the blog!  They will most likely be posted as the whim takes me, and not in chronological order, but that doesn't really matter anyway, does it.


We hope that you all had a lovely holiday (I hope you planned your crafty gifts better than I did!!). 
We wish you the happiest new year ever!  :o)


theknittingkitty for theknittycat

Friday, December 31, 2010

HAPPY NEW YEAR!! and HK in Kimono in motion...


Wishing you all a wonderfully Happy New Year!  
Filled with LOTS of amigurumi and Peeps!!  :o)
with Love from theknittycat / Shar and Mr. theknittycat / anthor


theknittingkitty for theknittycat

Tuesday, November 6, 2007

Why Knitting Peeps is Fun... and info about Hello Kitty and Muppet Peeps


Please check out www.flickr.com/knittycat for larger photos and all of the peeps.


Why knitting Peeps is fun...
  • You don't have to worry about gauge.
  • You rarely have to weave in ends (they just get buried into the peep).
  • You can use any yarn that pleases you, including scraps.
  • They are generally very short term projects (instant gratification - something we knitters don't often get).
  • Pretty much one-size-fits-all.
  • They give you the opportunity to try out new techniques on a small project.
  • They're cute and knitting them makes you a very cheerful knitter!
  • They make the recipients happy!
Okay, they won't keep you warm like socks, a scarf or a sweater, but they will give you the warm fuzzies inside.  :o)


Info about Hello Kitty Peep and Muppet Peeps...
I've been getting requests for patterns for a number of my peeps, and I want to thank you all so much for your kind interest in them!  :o)  I'm so pleased that you like them so much!  As you probably know by now, I don't actually HAVE patterns for them.  You may have already guessed that I'm not much of a pattern writer, since I like to make things up as I'm knitting them.  This makes it a little difficult to reproduce them.  :o)  But I am making an effort to share the things I've learned, and I'm writing up instructions as best as I can for the little guys.  I'll be putting up a "nearly" pattern for the Thing here soon, which has been taking up a LOT of my time, and frying my brain (at the moment, it's fairly complete except for the arms and hands), and then I'll be able to concentrate a little more on instructions for some of the other peeps.  I do have some notes on a couple of the others that just need finishing, and I'll put them up as soon as I'm able.


The Hello Kitty that some of you are interested in was actually a very simple variation on the classic peeps, which are made using the double knitting technique.  My recommendation is that you start out by trying out the free pattern for the double-knit bear that is linked to on the intro page (Peeps! and how to make them... Introduction).  It teaches the inside-out double knitting technique really well (that's where I learned it, though I had tried the right-side out technique previously), and it is the starting point for the classic peeps.


Then if you want to make Hello Kitty after that - her legs are a bit shorter and instead of increasing in the center of the front of the face, you increase at the sides, to make her head wide and rather flat, and quite large in proportion to the rest of her body. 

(TIP:  I find it unwieldy to do much increasing and decreasing while the peep is inside out, so I turn them right side out after the arms are made, and place the stitches on two circular needles to do the increasing for the head, or you could use dpns.  Also, I've found that turning goes a lot easier if you turn the arms first.  I also stuff the legs, arms and body at this point, using the back end of a size K crochet hook to push the stuffing into the limbs.)


I used a slip stitch technique to shape her ears so I wouldn't have to knit them separately and sew them on (which I heartily dislike doing), but it would work just as well to make them separately, or pick up stitches at each side of the head for them.  I will eventually provide the slip stitch technique, but I'm not sure when I'll get to it, since there are so many things to do!  So I'd suggest making the ears one of the other ways, and not waiting for me!  :o)   When I do make the bits and pieces separately, I knit them in the round with 2 circular needles so I don't have to make a front and back and sew them together.  The ears on the classic peeps are double knitted while making the heads, and require a break in the yarn for the second ear, but no other sewing.  (Have you gotten the idea yet that I don't like sewing?). 


As to the muppets... I don't have any patterns started yet, but since I am making an Elmo, and possibly a Cookie for Christmas gifts, I will try to make some notes as I go.  Except for Kermie, They are based on the classic peeps, but are larger, and have much larger heads.  Then their eyes, Elmo's nose, and Cookie's cookies were knitted separately in the round, then stuffed and and sewn on.  Kermie was approached totally differently, knitting his body and head in the round in one piece, then each limb knitted in the round, then stuffed and sewn on.


I hope this has been helpful to you.  If you check back here occasionally, I hope to eventually get some patterns done and posted.  But as I keep making new peeps, and I'm as slow as a snail at writing patterns (if a snail wrote patterns) ... I think it is going to be a looong process!  :o) 


Wednesday, September 26, 2007

Character Peeps - Marvel Comics' the Thing


I recently posted a new Character Peep to our flickr pages modeled after the Marvel Comics' character the Thing (link), and suddenly, it went a little mad in our e-world!  :o)  Apparently, there is a LOT of interest in the Thing (member of the Fantastic Four in Marvel Comics, and recently immortalized even further in a big screen movie).  Folks were viewing and blogging about our humble little version, and interest in a pattern became apparent.


Making the Thing
Unfortunately, as I've mentioned, I rarely knit from a pattern, and usually knit freehand, inventing (sculpting the shape) as I go, so there is really no exact documentation of how I made the Thing.  I can reconstruct a close approximation of how I made him, but the exact execution will be up to anyone who wants to duplicate my efforts.
Update: I'm hard at work, writing an actual pattern.  I hope to have it finished within the next week, and I will post a link here as soon as it is ready.


I did take a few "in progress" photos, during his construction, and hope that they will help you to visualize the process.  I will include them on the page with the pattern when it is completed.


BRIEF OVERVIEW OF THE THING'S CONSTRUCTION:

There is really nothing very unusual about the construction of the Thing. He's actually engineered in the same way as any basic, two-legged, standing, toy, and can be crocheted, instead of knit, if you prefer.  My version is knit in seed stitch (k1p1 then knit the purls and purl the knits) except for the shorts which are stockinette.

If you've made other toys or amigurumi, he is made using the same process.


  • Starting from one foot, knit the foot and leg in the round in the same way that you'd knit a simple sock or bootie.
  • Put the stitches from the first leg onto a holder and make the second leg the same as the first and add the toes to both feet.
  • Attach the color for the shorts and knit across both legs (front and back), picking up the stitches for the first leg from the holder.

  • Knit the torso in the round up to the neck, (changing back to the body color at the waist).
  • Knit the head and arms (including the fingers) and sew them onto the torso.
  • Knit the brow ridge and sew it on.
  • Knit the waistband and sew it on
  • Pop in the eyes and embroider the mouth

VOILA!  The Thing!


Since he wasn't going to a small child, I did insert pipe cleaners into the legs, arms and torso, to give a little posability and stability (because he's so top heavy).

For much more detailed instructions, please see the Pattern for the Thing linked to on the

MERRY CHRISTMAS! Our gifts to you - PATTERNS!!

post. (now finished!)    :o)

Monday, September 10, 2007

Peeps! and how to make them... Introduction


To view the Peeps Collection, please visit our flickr site www.flickr.com/knittycat

My abortive attempt to blog the Peep Saga has been put on hold because it's taking me too long to get it going.  Sooo... I've decided to start this little interim blog to more quickly address the requests for patterns and how-to's that are coming in, while I'm bogging along with the main blog.  :o)
I make my Peeps (also known as Amigurumi) freehand, without patterns (unless I write one), and only some of them with a plan.  :o)   Almost all are knitted, as that is my current passion (and is much easier on my painful hands), but I reserve the right to toss in a crocheted one whenever the whim strikes.  ;o)


There are four distinct varieties of peeps:
Classic Peeps,     Character Peeps,
        More Elaborate Peeps,

  and Inanimates (food and other items). 
Plus there are always guys that don't fit any of those categories,
  
so they will be Special Peeps.


Classic Peeps:
Classic Peeps are made using the double knitting method from the legs to the neck.
For an excellent description of this technique, please see this pattern.  www.free-knitting-pattern.com/doubleknitbear.htm
Although I cannot find the author's name on her site, she does give the following credits for the inspiration for this pattern:
"I got this idea from Jacquee Gillespie of Heber, Utah. The Double Knitting technique is from Beverly Royces’ book which is edited by Meg Swanson and available from Interweave Press."  The doubleknit bear pattern author also has this pattern available for purchase in a package with other patterns here or alone here.
Double knitting, using the method described above, is a really fast and easy way to knit a simple three dimensional tube-like item.  You knit the item inside out so that you simply knit one stitch and slip the next, across the needle (you don't need to pass the working yarn back and forth like you do with double knitting right-side-out).  This knits one side of the item, then you turn the needles and knit/slip across the other side.  When you finish, you turn the item right side out, and VOILA!  It's one piece of in-the-round knitting that you did straight across!  Magic!  :o)
The body, legs and arms of each of the classic peeps are knitted with this method, inside out, in one piece, on one circular needle (you can use two straight needles if you prefer) and then turned right side out and placed on two circs (or on dpns if you're comfortable with them), and the head is knit in the round.  The pieces are all together when you finish knitting, and there are no seams to sew.
In the pattern (above) for the doubleknitbear, the author suggests that the head also be done with the doubleknitting technique, but I find it unwieldy to do much shaping while doubleknitting, so I turn the peeps right-side-out before knitting the head, and continue in the round from that point.
More examples of classic peeps:
C & C's kitty peepsPenelope PigolettaSissy in her new pink lace dressThe Vanilli Sisters - 3 Giggle Bunnies


Character Peeps:
Character Peeps are based on existing characters and are created in a variety of ways, depending on the looks of the character, and my mood.  :o)  And the desires of the recipient, if they know about the gift before it's made.
Some of them (like Elmo and Cookie and Kitty and Super Bear) are started in the classic peep method, and veer off when the head is made.  Some (like Kermie and Hedwig and Taz) bear no resemblance to the classic peep creation method, and are each approached on an individual basis.


Cookie MonsterElmo & GoldySuper Bear Peep in flight with cloudsAlex's snowy owl HedwigHello Kitty for Nicole front 3 qtr


More Elaborate Peeps:

More Elaborate Peeps are also created in a variety of ways, depending on the looks of the character, and my mood.  :o)  And the desires of the recipient, if they know about the gift before it's made.  But these aren't based on an existing character.  The inspiration for them can come from anywhere, and their design may begin with looking at lots of pictures of real and imaginary animals (like for Linus the Penguin, and Harmony the Hedgehog) or may just be a product of imagination (like Marietta the Flat Cat, the kitty pillows, or the video game bunnies).
 
 
MiniMe  turtle cupped in my handKristina's birthday & D's armrest  kitty pillows & wee prototypeTony's video game character Easter "bunny"Linus the Penguin with scarf & hatKatie's Flat Cat Marietta side
Some of them (like Marietta and the kitty pillows) are made using the double knitting technique, but most are knit in the round on two circs.  There are a few exceptions, of course, like MiniMe the crocheted turtle, and Harmony the Hedgehog, who was knit partially in the round but, although the fuzzy back was knit at the same time as the front, they weren't connected while knitting and had to be sewn up (ugh!) later.


Inanimates:
So far, most of the inanimates are food, and most are created simply knitting in the round with two circular needles.  There are exceptions, of course, including an "unbroken" heart which is created all in one piece, using slip stitches, with no break in the yarn to make the second lobe.  Most of them, thus far, have been created as brain food for the ZomPeeps (more on that later).


Unbroken HeartPeter Pumpkinhead's pumpkin w flashZompeeps & Fruit Brains with flashtomato in handDiane's bday ice cream dish sewing kit - with a cherry on top